Google Webmaster: How to Add Your Site to Google Search Console
Learn how to add your site to Google Search Console, verify ownership via DNS or HTML tags, and set up index monitoring to drive traffic growth.

To add a site to Google Search Console, go to search.google.com/search-console, click "Add property," select the property type, paste your URL, and verify ownership using one of five methods. The entire process takes 10-15 minutes if you already have access to your DNS settings or hosting files.
TL;DR
- Google Search Console (formerly Google Webmaster Tools) is a free tool for monitoring your site's performance in Google Search.
- Adding your site doesn't directly affect rankings, but without it, you won't see indexing errors or click data.
- Two property types: "Domain" covers the entire domain; "URL prefix" covers only a specific address.
- The fastest ways to verify ownership are via an HTML tag or Google Analytics (if the tracking code is already installed).
- Your first priority after adding the site is to submit a sitemap.
Why Add Your Site to Google Webmaster Tools
Google Search Console is a free service for webmasters. It shows you how the search engine sees your site: which pages are indexed, which queries drive traffic, and whether there are technical errors.
Without Search Console, you're flying blind. Specifically, you won't see which pages Google refuses to index, you won't receive manual action (penalty) notifications, and you won't be able to manually request a recrawl after fixing errors.
Three situations where you need to register immediately:
- You've launched a new site and want to speed up indexing.
- You've migrated to HTTPS or changed domains and need to notify Google about redirects.
- You've noticed a drop in traffic and want to find the cause in search data.
What You'll Need Before Starting
- A Google account (Gmail or a corporate Google Workspace account).
- Access to one of the following: domain DNS records, site files via FTP/hosting panel, the
<head>section of your pages, Google Analytics, or Google Tag Manager. - The site address (the exact URL with the protocol:
https://example.com).
If your site is on WordPress, Tilda, or another CMS, you can usually access the page code through theme settings or plugins. For DNS verification, you'll need access to your domain registrar's control panel.
Step 1. Open Google Search Console and Sign In
Go to search.google.com/search-console. Click "Start now." Sign in with the Google account you plan to use to manage the site.
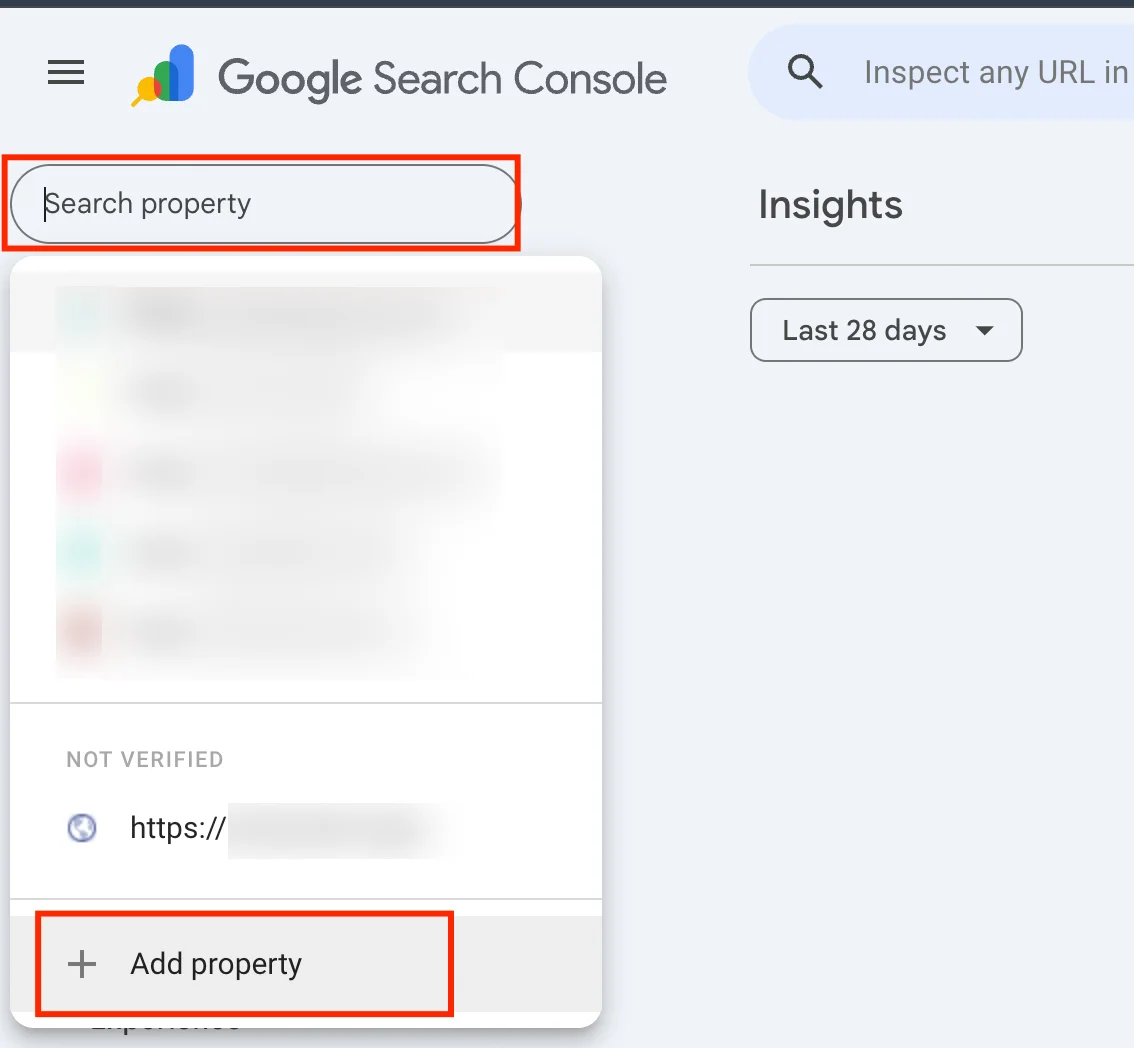
If you already have properties in Search Console, the interface will open to your current property list. The button to add a new property is in the top left corner: click the name of your current property, and select "Add property" from the dropdown menu.
Step 2. Select Property Type
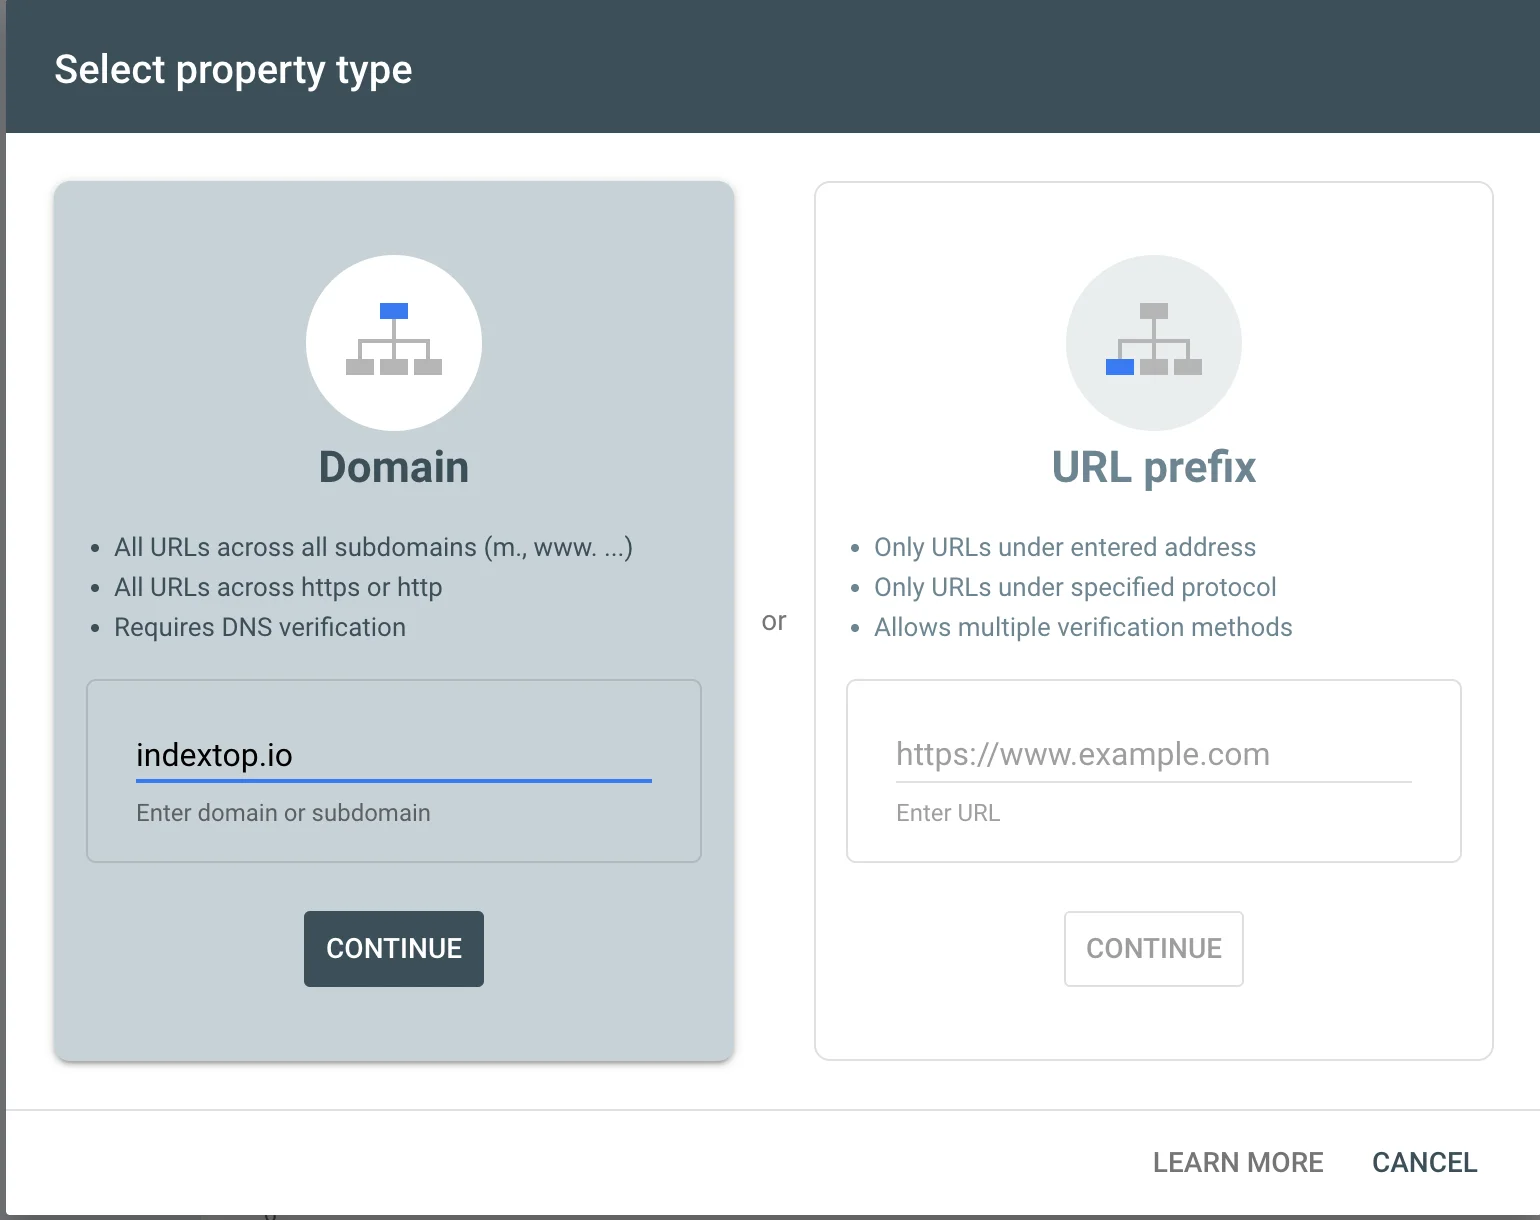
After clicking "Add property," a window appears with two options.
Domain Property
You enter only the domain without the protocol: example.com. Search Console will track all versions of the site at once: http://, https://, www., non-www., and all subdomains. Verification is only available via a DNS TXT record.
URL Prefix Property
You enter the exact address with the protocol: https://example.com. Only this specific version is tracked. However, all five verification methods are available.
Which to choose: For most sites, "Domain Property" is better because it provides a complete picture without splitting data by version. The exception is if you have several different projects on subdomains (blog.example.com, shop.example.com) and want to track them separately.
Step 3. Enter the Site Address
For a Domain property, enter the domain without https://: for example, example.com.
For a URL prefix property, enter the full address including the protocol. If your site runs on https://, enter https://, not http://. These are treated as different properties in Search Console.
Click "Continue."
Step 4. Verify Ownership
This is the critical step. Google must confirm that you own the site, not just that you know its address. Domain properties have one method, while URL prefix properties have five.
DNS TXT Record (for Domain Properties)
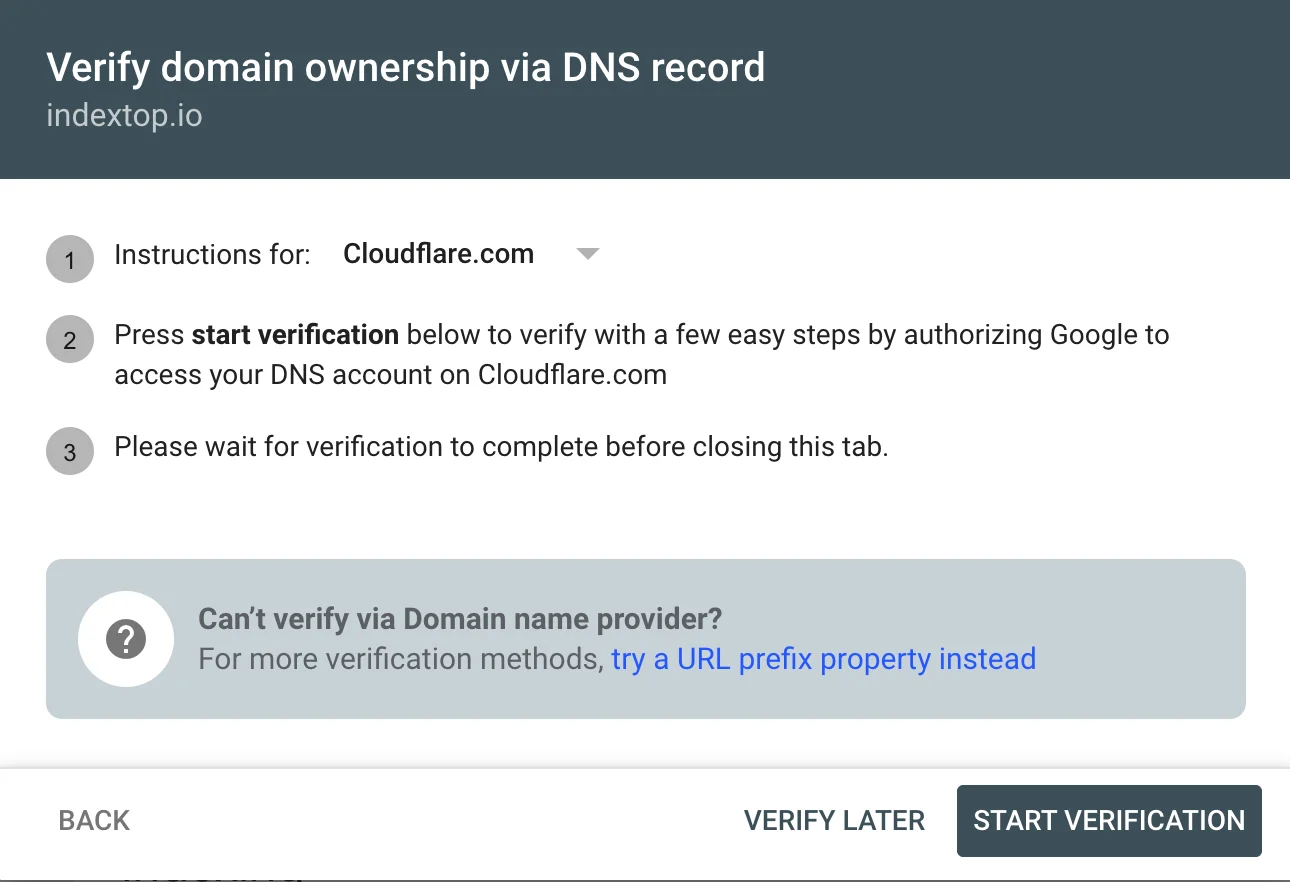
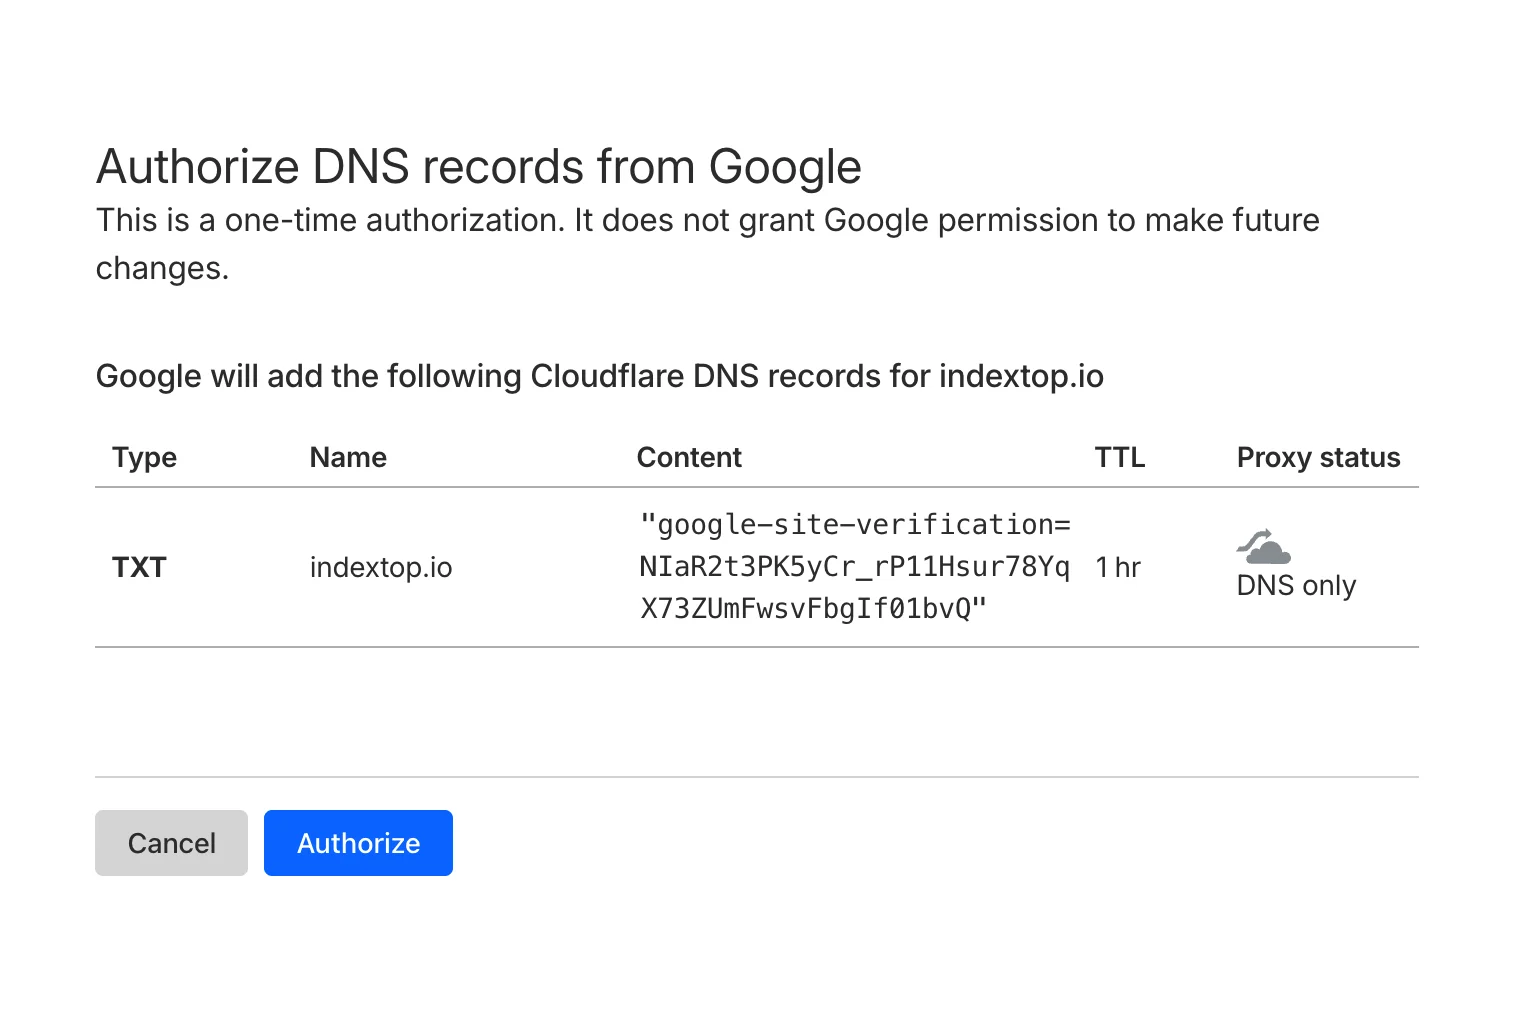
Google provides a string like google-site-verification=xxxxxxxxxxxxxxxx. You need to add this as a TXT record to your domain's DNS.
Where to do this: In your domain registrar's control panel (Namecheap, GoDaddy, etc.) or your DNS hosting settings. After adding the record, click "Verify" in Search Console. DNS changes can take 15 minutes to 48 hours to propagate, but it's usually much faster.
HTML Tag (for URL Prefix Properties)
Google provides a meta tag like <meta name="google-site-verification" content="...">. You need to paste this into the <head> section of your site's homepage, before the closing </head> tag.
On WordPress, this is done via a plugin (like Yoast SEO or Rank Math) or through the theme editor in the header.php file. On Tilda: Site Settings → SEO → "Edit HEAD code."
HTML File
Download the file provided by Google (named something like googleXXXXXXXX.html) and upload it to your site's root folder. The file should be accessible at https://example.com/googleXXXXXXXX.html.
Google Analytics
If you already have Google Analytics installed on the site using the same Google account, select this method. No additional steps are needed: Search Console will automatically check for the Analytics code on the page.
Google Tag Manager
Similar to Analytics: if your GTM container is already published on the site and linked to the same account, this method will work instantly.
After completing the required step, click "Verify." If successful, you'll see an "Ownership verified" message.
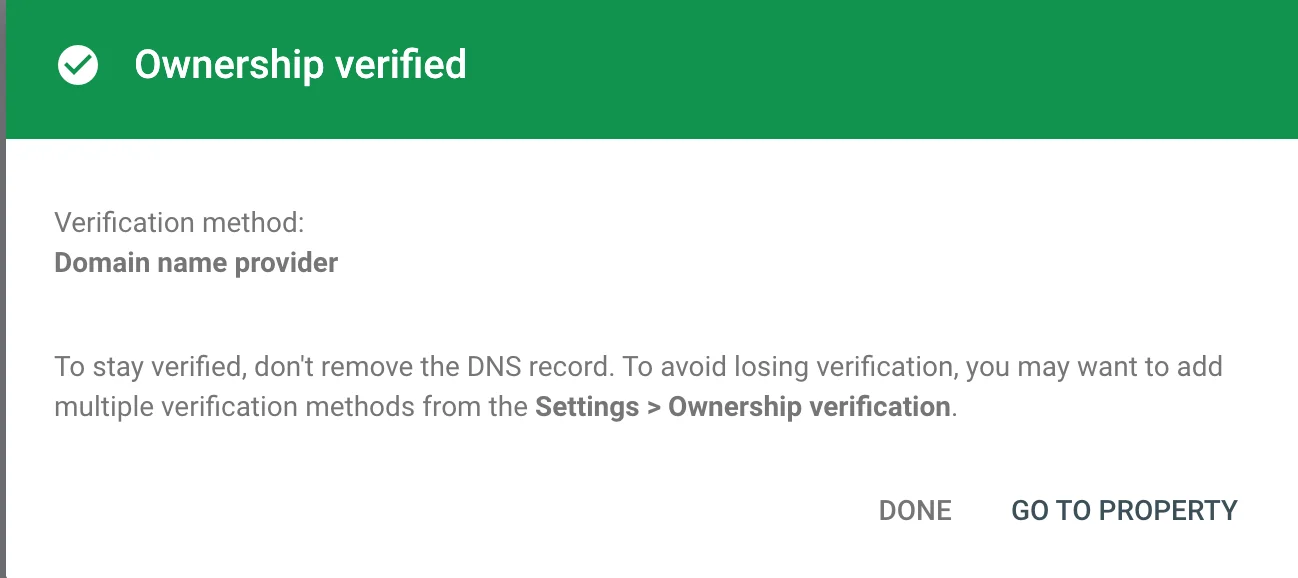 Screenshot: Successful verification message
Step 5. Submit a Sitemap
A sitemap is an XML file listing all the pages you want the search engine to index. Submitting a sitemap speeds up indexing, especially for new sites.
Where to find your sitemap:
- WordPress with Yoast SEO:
https://example.com/sitemap_index.xml - WordPress with Rank Math:
https://example.com/sitemap_index.xml - Tilda:
https://example.com/sitemap.xml - Bitrix:
https://example.com/sitemap.xml
Exact sitemap URLs depend on your plugin version and CMS settings.
How to submit: In the left menu of Search Console, select "Sitemaps" (under the "Indexing" section). In the "Add a new sitemap" field, enter the path to the file (only the part after the domain, e.g., sitemap_index.xml) and click "Submit."
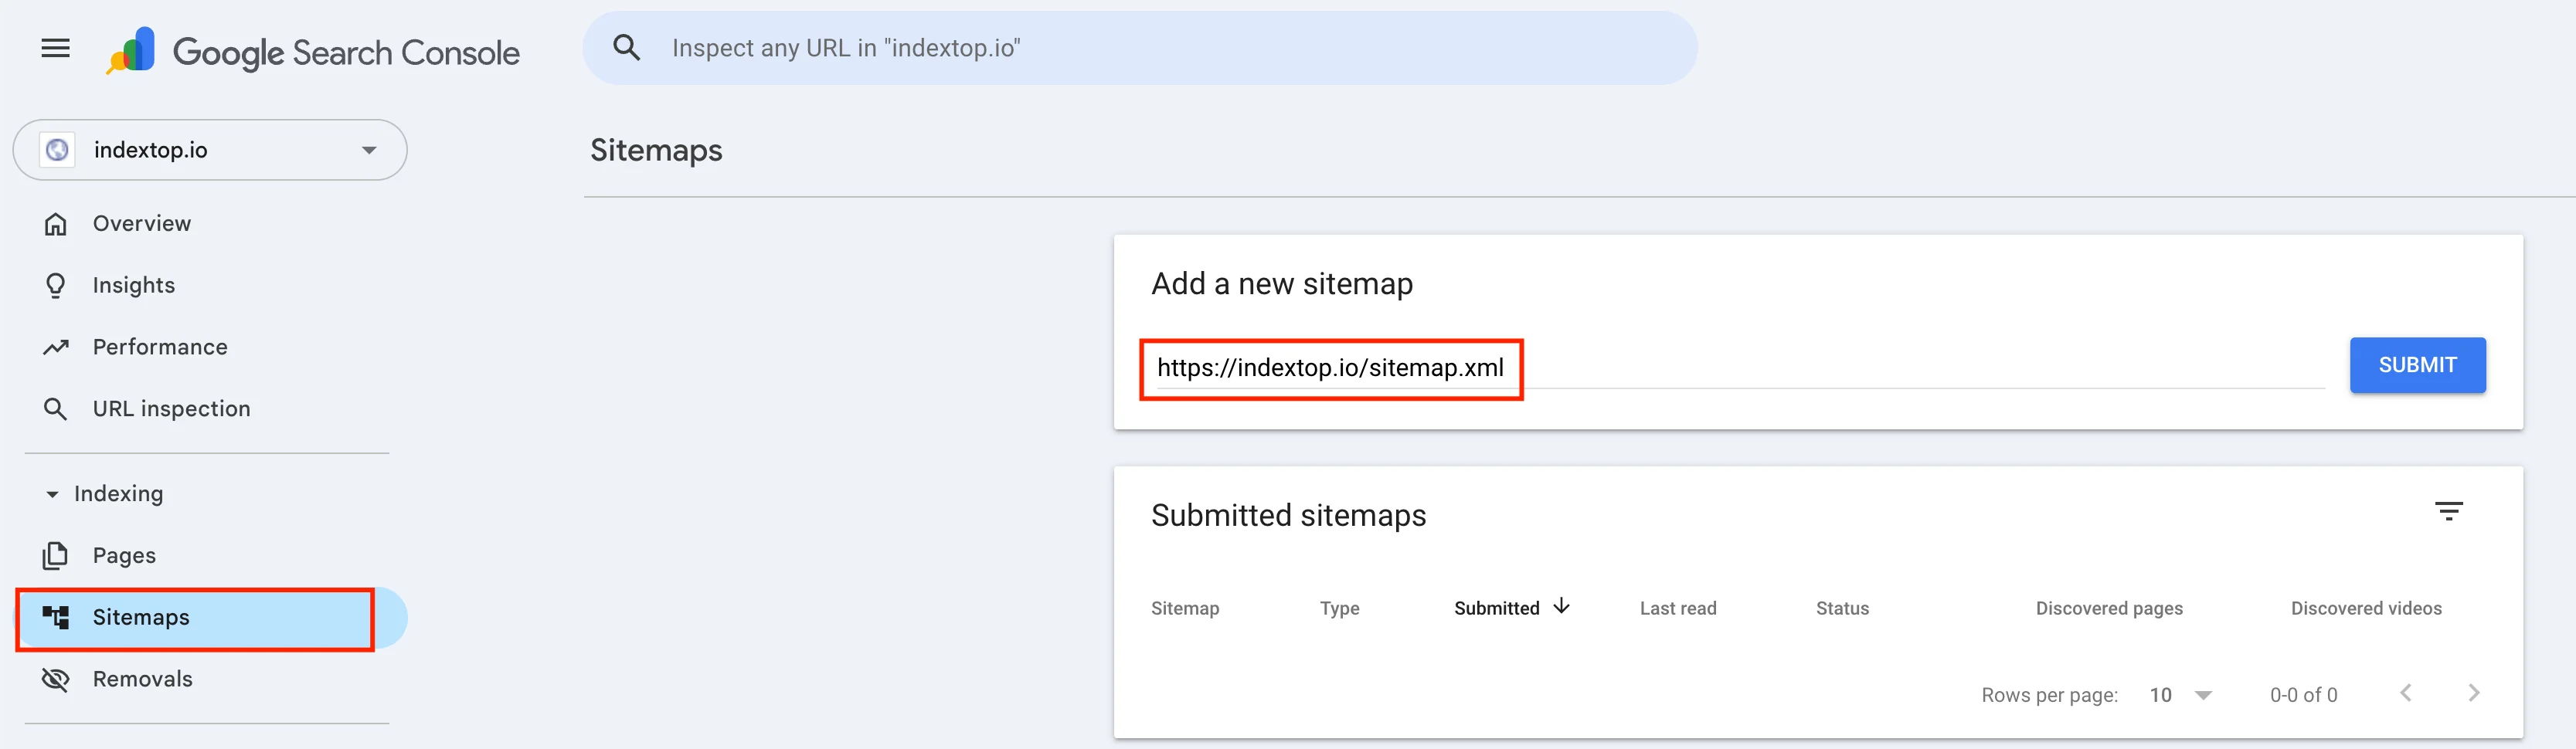 Screenshot: Sitemaps section, submission field
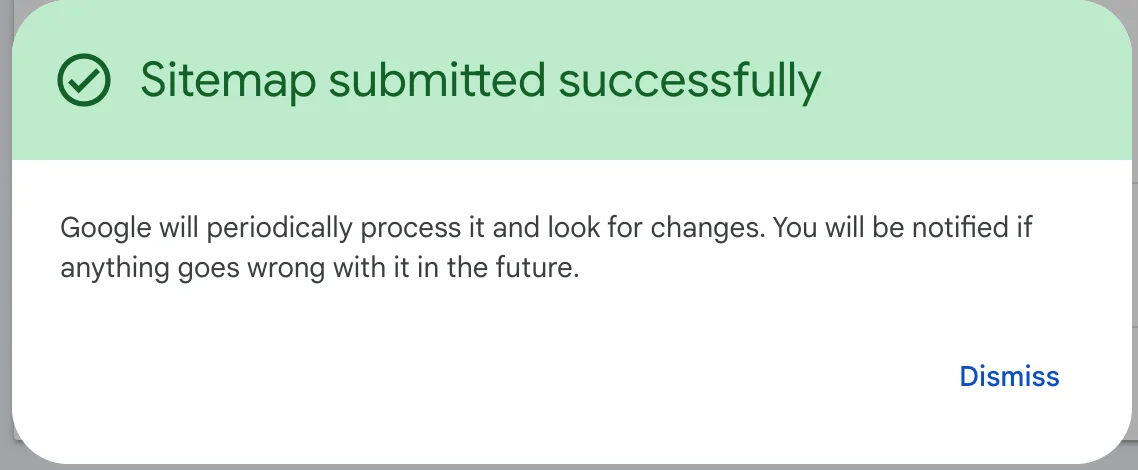
A "Success" status means Google has accepted the file. Actual page indexing can take anywhere from a few hours to several weeks, depending on the site's age and authority.
Common Setup Errors
Incorrect protocol. You enter https://example.com, but the site actually runs on http:// (or vice versa). Search Console will register the property, but the data will be incomplete. Check your URL in the browser before entering it.
Adding only one version. If you have both www.example.com and example.com and you chose "URL prefix property," data for the different versions will go into different properties. Solution: Use "Domain property" or add all versions manually and set a preferred one.
DNS TXT record error. Copy the verification string exactly, without extra spaces. In some DNS panels, the host field should be left blank or set to @. Interfaces vary by registrar.
Removing the verification tag after confirmation. Ownership is re-verified periodically. If the tag or file disappears, Google will send a warning and eventually revoke access. Keep the verification element in place.
Sitemap returns a 404. Before submitting, open the sitemap URL in your browser to ensure the file exists. If you see a 404 error, the map hasn't been generated or the path is wrong.
FAQ
How long does verification take?
Will adding my site to Search Console improve my rankings?
Can I add someone else's site?
How many sites can I add to one account?
What if verification keeps failing?
Do I need to add subdomains separately?
When will the first data appear in Search Console?
Immediate Next Steps
Three things to do in the first 30 minutes:
- Check indexing status. The "Pages" section (or "Coverage" in the old interface) shows how many pages are indexed and if there are errors.
- Request indexing for the homepage. Enter the URL in the inspection bar at the top of the screen and click "Request Indexing." This doesn't guarantee instant indexing, but it signals the page's priority to Google.
- Link Search Console to Google Analytics. In Google Analytics settings (Admin → Product Links), connect your Search Console property. This allows search query data to appear directly in your Analytics reports.
To dive deeper, your next step is to study the Performance reports in Search Console to understand how to read query data, CTR, and rankings.
Adding a site to Google Search Console takes 10-15 minutes. Once verified, you'll have access to data that is otherwise unavailable: indexing errors, real search queries, and mobile usability issues. Without this tool, SEO is just guesswork.
Read also

How to Install Google Analytics on Your Website: A Step-by-Step Guide
A step-by-step guide to setting up Google Analytics 4 on your website. Learn how to create an account, configure a data stream, and install the code without any coding skills.

How to Add Your Site to Yandex Webmaster and the Search Index: A Step-by-Step Guide
Step-by-step guide to adding your website to Yandex Webmaster. Learn how to verify domain ownership using four different methods and successfully get your pages indexed.