How to Install Google Analytics on Your Website: A Step-by-Step Guide
A step-by-step guide to setting up Google Analytics 4 on your website. Learn how to create an account, configure a data stream, and install the code without any coding skills.

Applies to Google Analytics 4.
Google Analytics 4 is a free tool that shows how many people visit your website, where they come from, and what they do on your pages. Setting up Google Analytics correctly involves four steps: creating an account, adding a GA4 property, configuring a data stream, and placing the code on your website. The entire process takes 15-20 minutes and requires no coding skills.
What you'll need before you start
Make sure you have the following ready before you begin:
- A Google account. A standard Gmail account works perfectly.
- Access to your website's code or CMS admin panel. To paste the code manually, you'll need access to your theme files or the global
<head>template. - For WordPress: Administrator rights in wp-admin. You won't be able to install plugins without them.
- For website builders (Tilda, Wix, Squarespace): Access to site settings with a field for the analytics code/ID.
Make sure your site is published and accessible via its URL. GA4 will only start collecting data once real users visit your pages or you open the site yourself to test it.
Step 1. Create a Google Analytics account
Go to analytics.google.com and sign in with your Google account.
If this is your first time using GA4, click "Start measuring." If you already have accounts, click "Create" in the bottom-left corner and select "Account."
In the "Account name" field, enter your organization or project name. This name is only visible to you in the interface. Below, you can configure data sharing settings: by default, all options are checked, which is ideal for most websites. Click "Next."
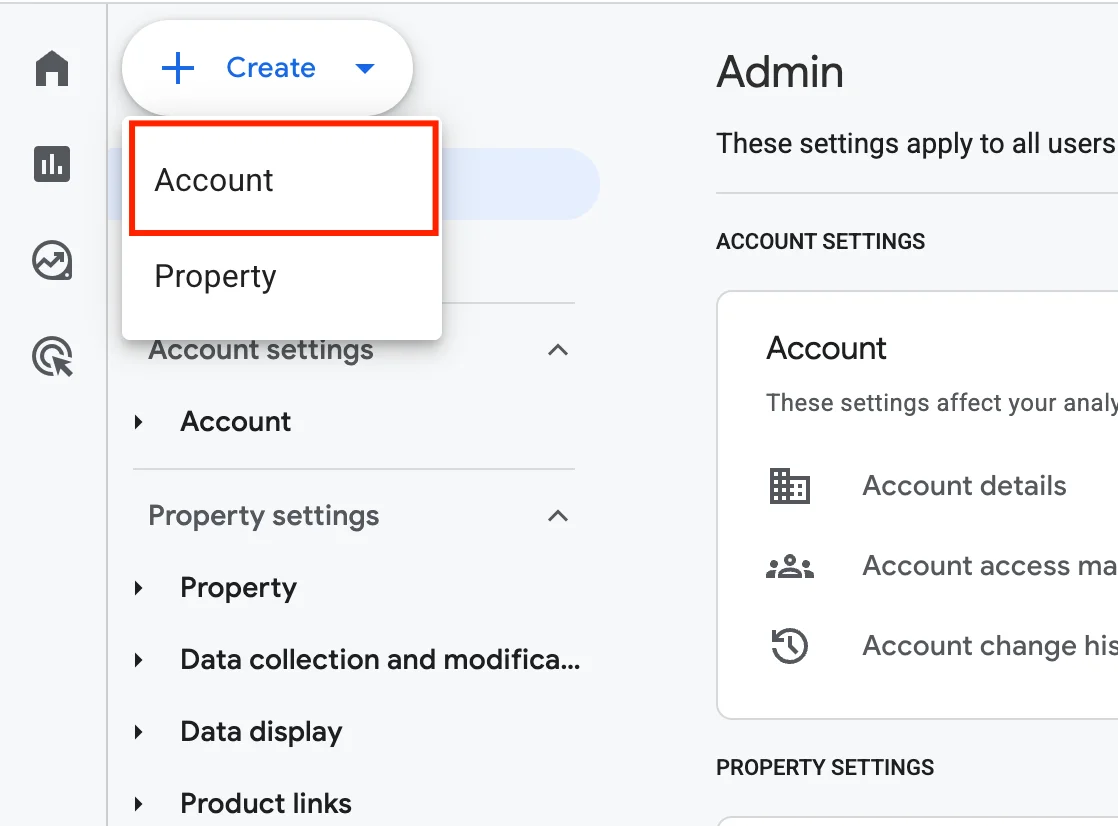
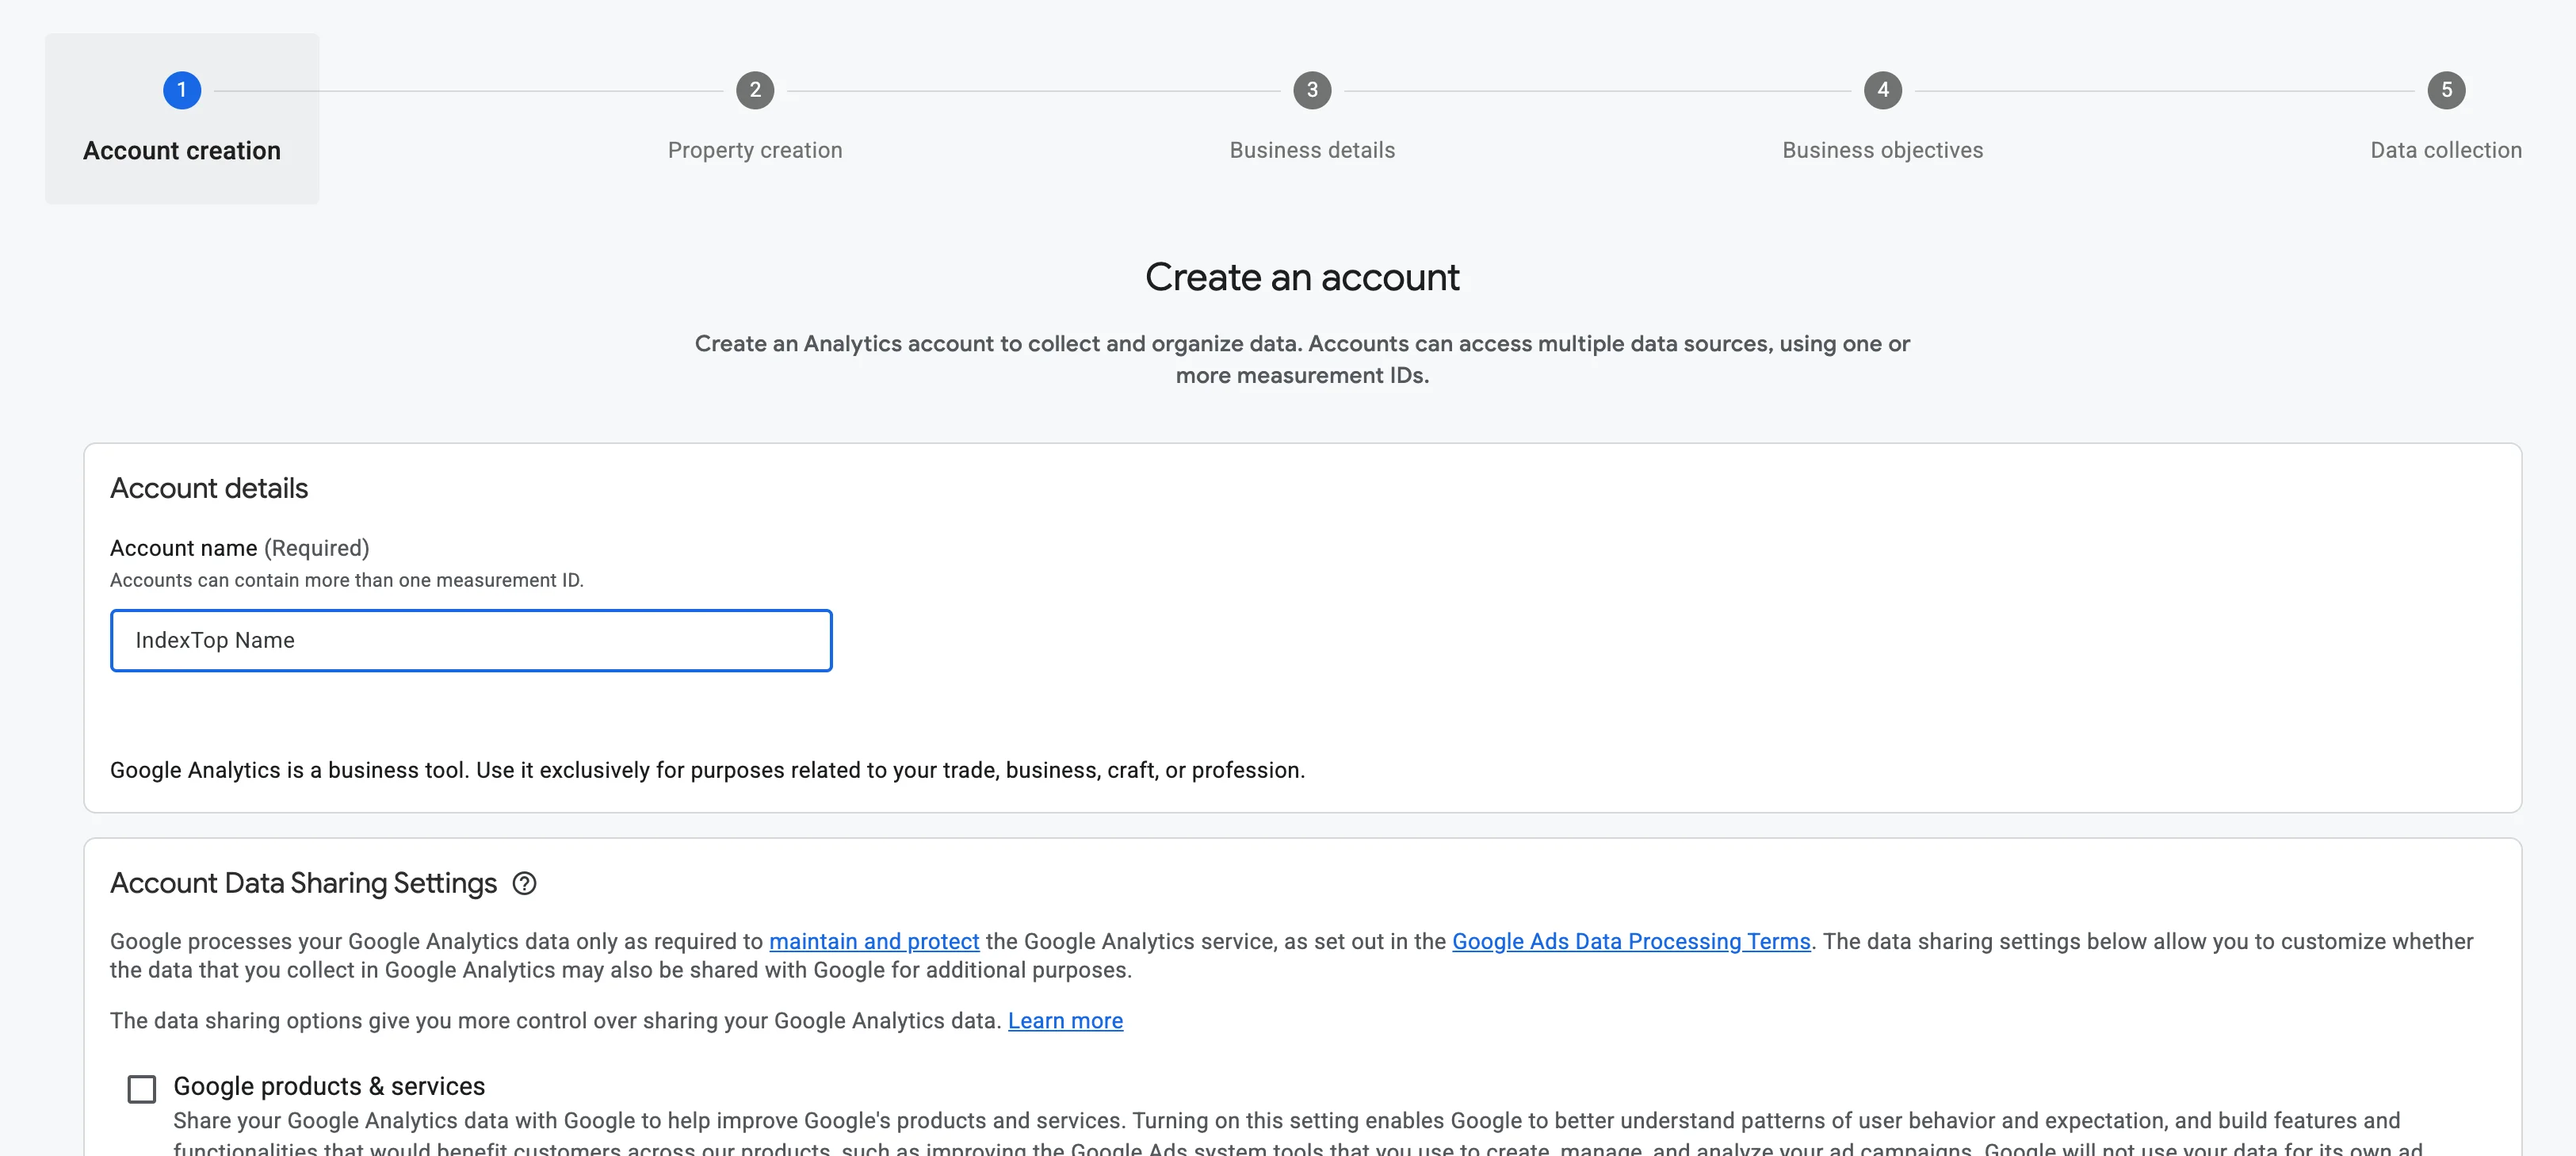 Screenshot: GA4 account creation form with the name field
Step 2. Create a GA4 property
A property is where your data is collected. You can link multiple properties to a single account-for example, one for each of your websites.
Enter a property name (using your domain like example.com is a good practice), and select your reporting time zone and currency. The time zone directly affects your reports: if you set it to UTC instead of your local time, your daily data will shift, and you might see morning traffic attributed to the end of the previous day.
Click "Next." The setup wizard will ask about your industry and business objectives. These fields are optional, but filling them out helps Google set up relevant default report templates. Click "Create" and accept the terms of service.
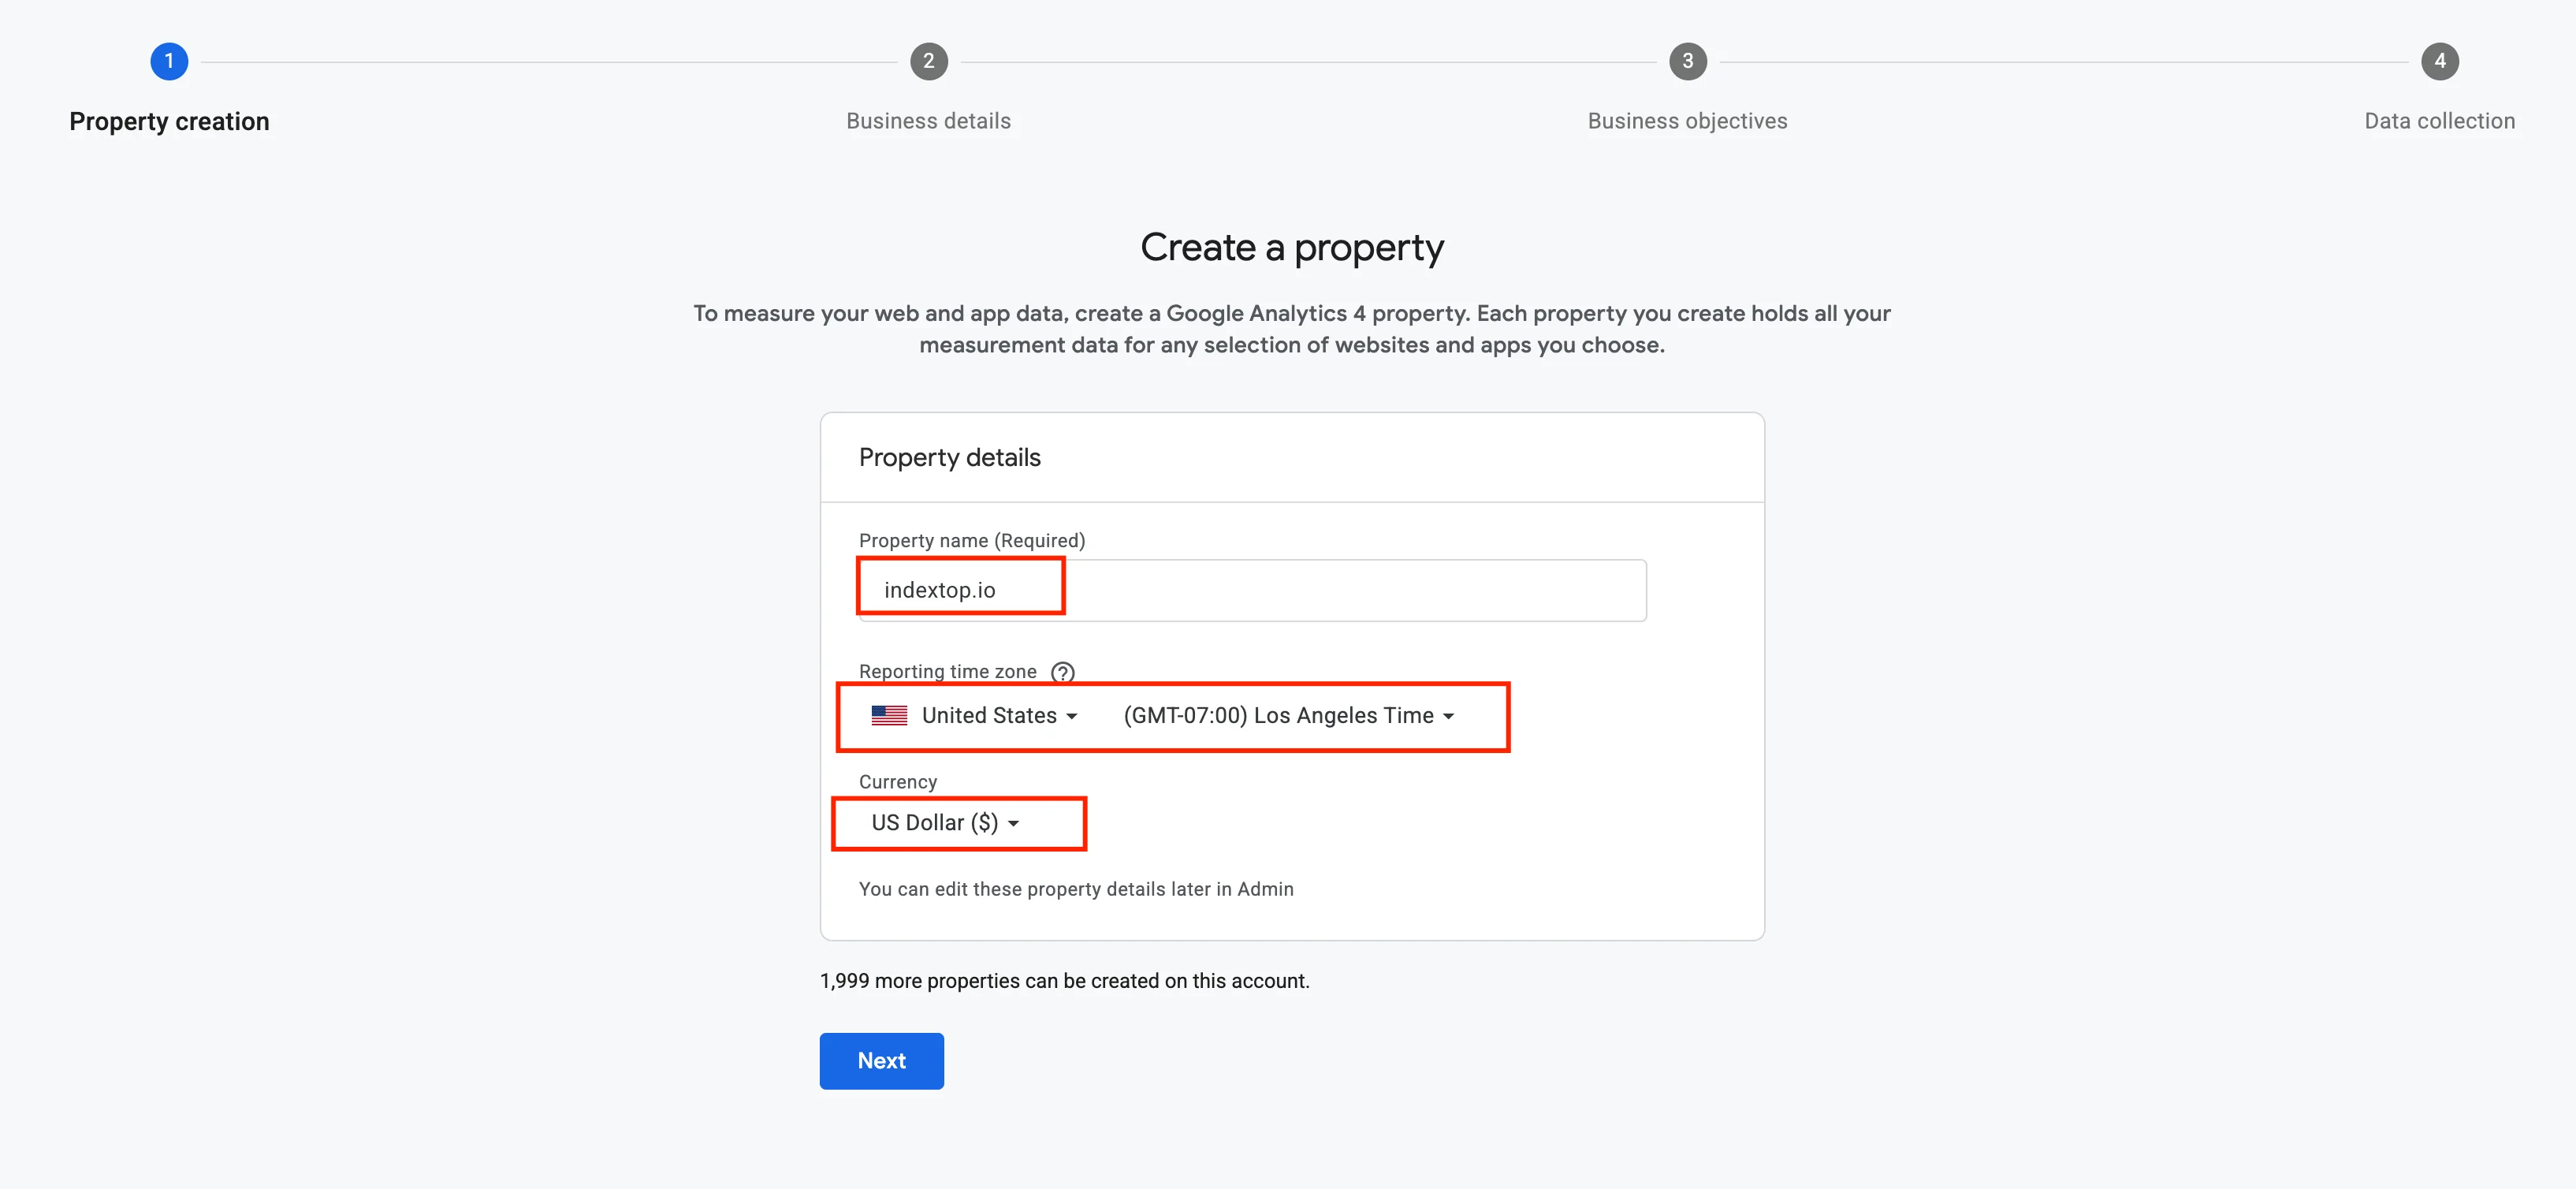 Screenshot: GA4 property settings showing name, time zone, and currency
Step 3. Set up a data stream
After creating the property, GA4 will prompt you to choose a platform. For a website, select "Web."
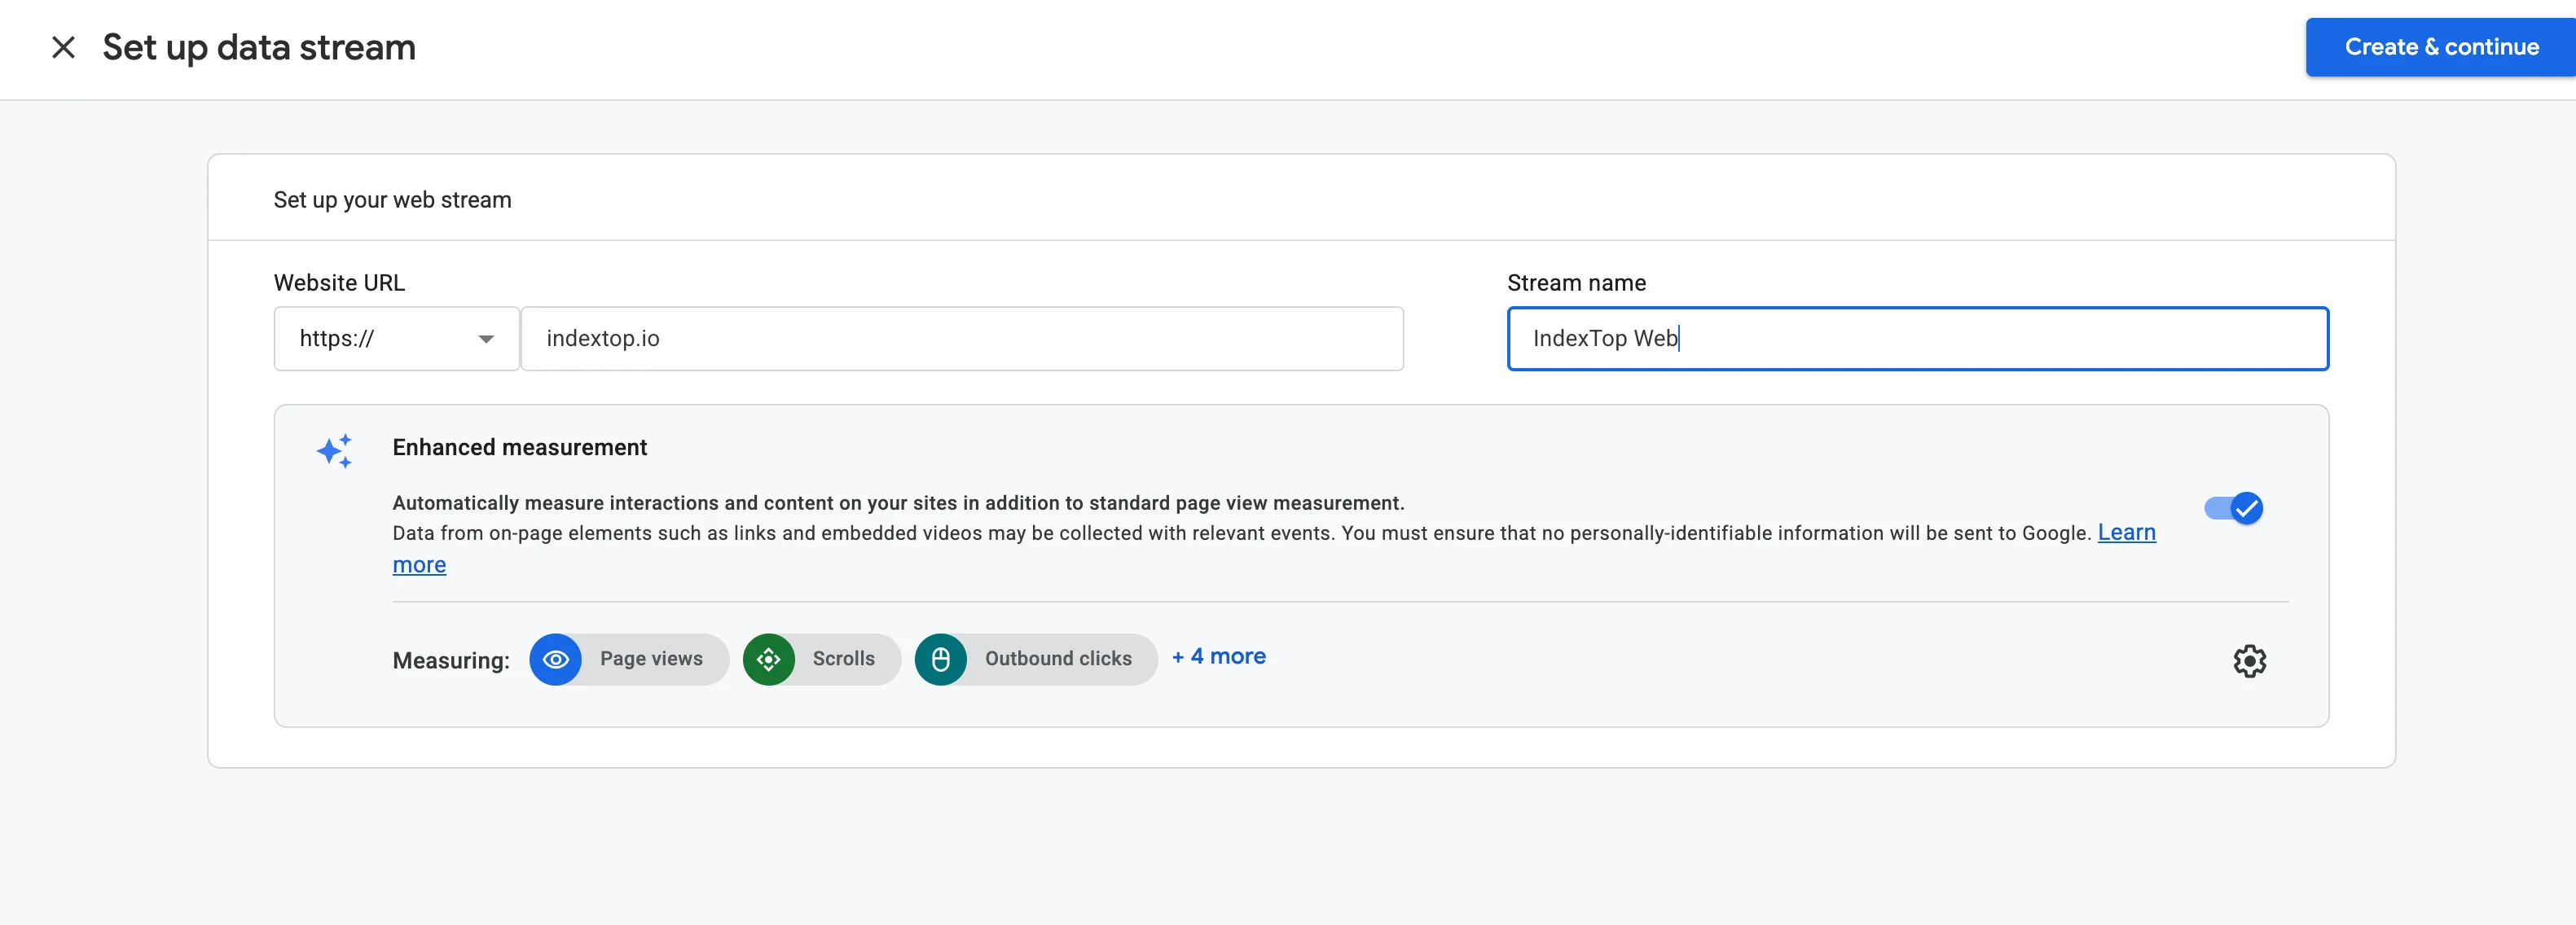
Enter your website URL (starting with https://) and name the stream (e.g., "Main Website"). Click "Create stream."
The web stream details page will open. The key element here is your Measurement ID, formatted as G-XXXXXXXXXX. Copy it to your clipboard or keep the tab open, as you'll need it in the next step.
On the same page, make sure Enhanced Measurement is enabled. This toggle is active by default. It automatically tracks scroll depth, outbound clicks, site searches, and file downloads without requiring extra code.
 Screenshot: Data stream details page showing the G-XXXXXXXXXX Measurement ID
Step 4. Add the tracking code to your site manually
This method works for any CMS and static HTML websites.
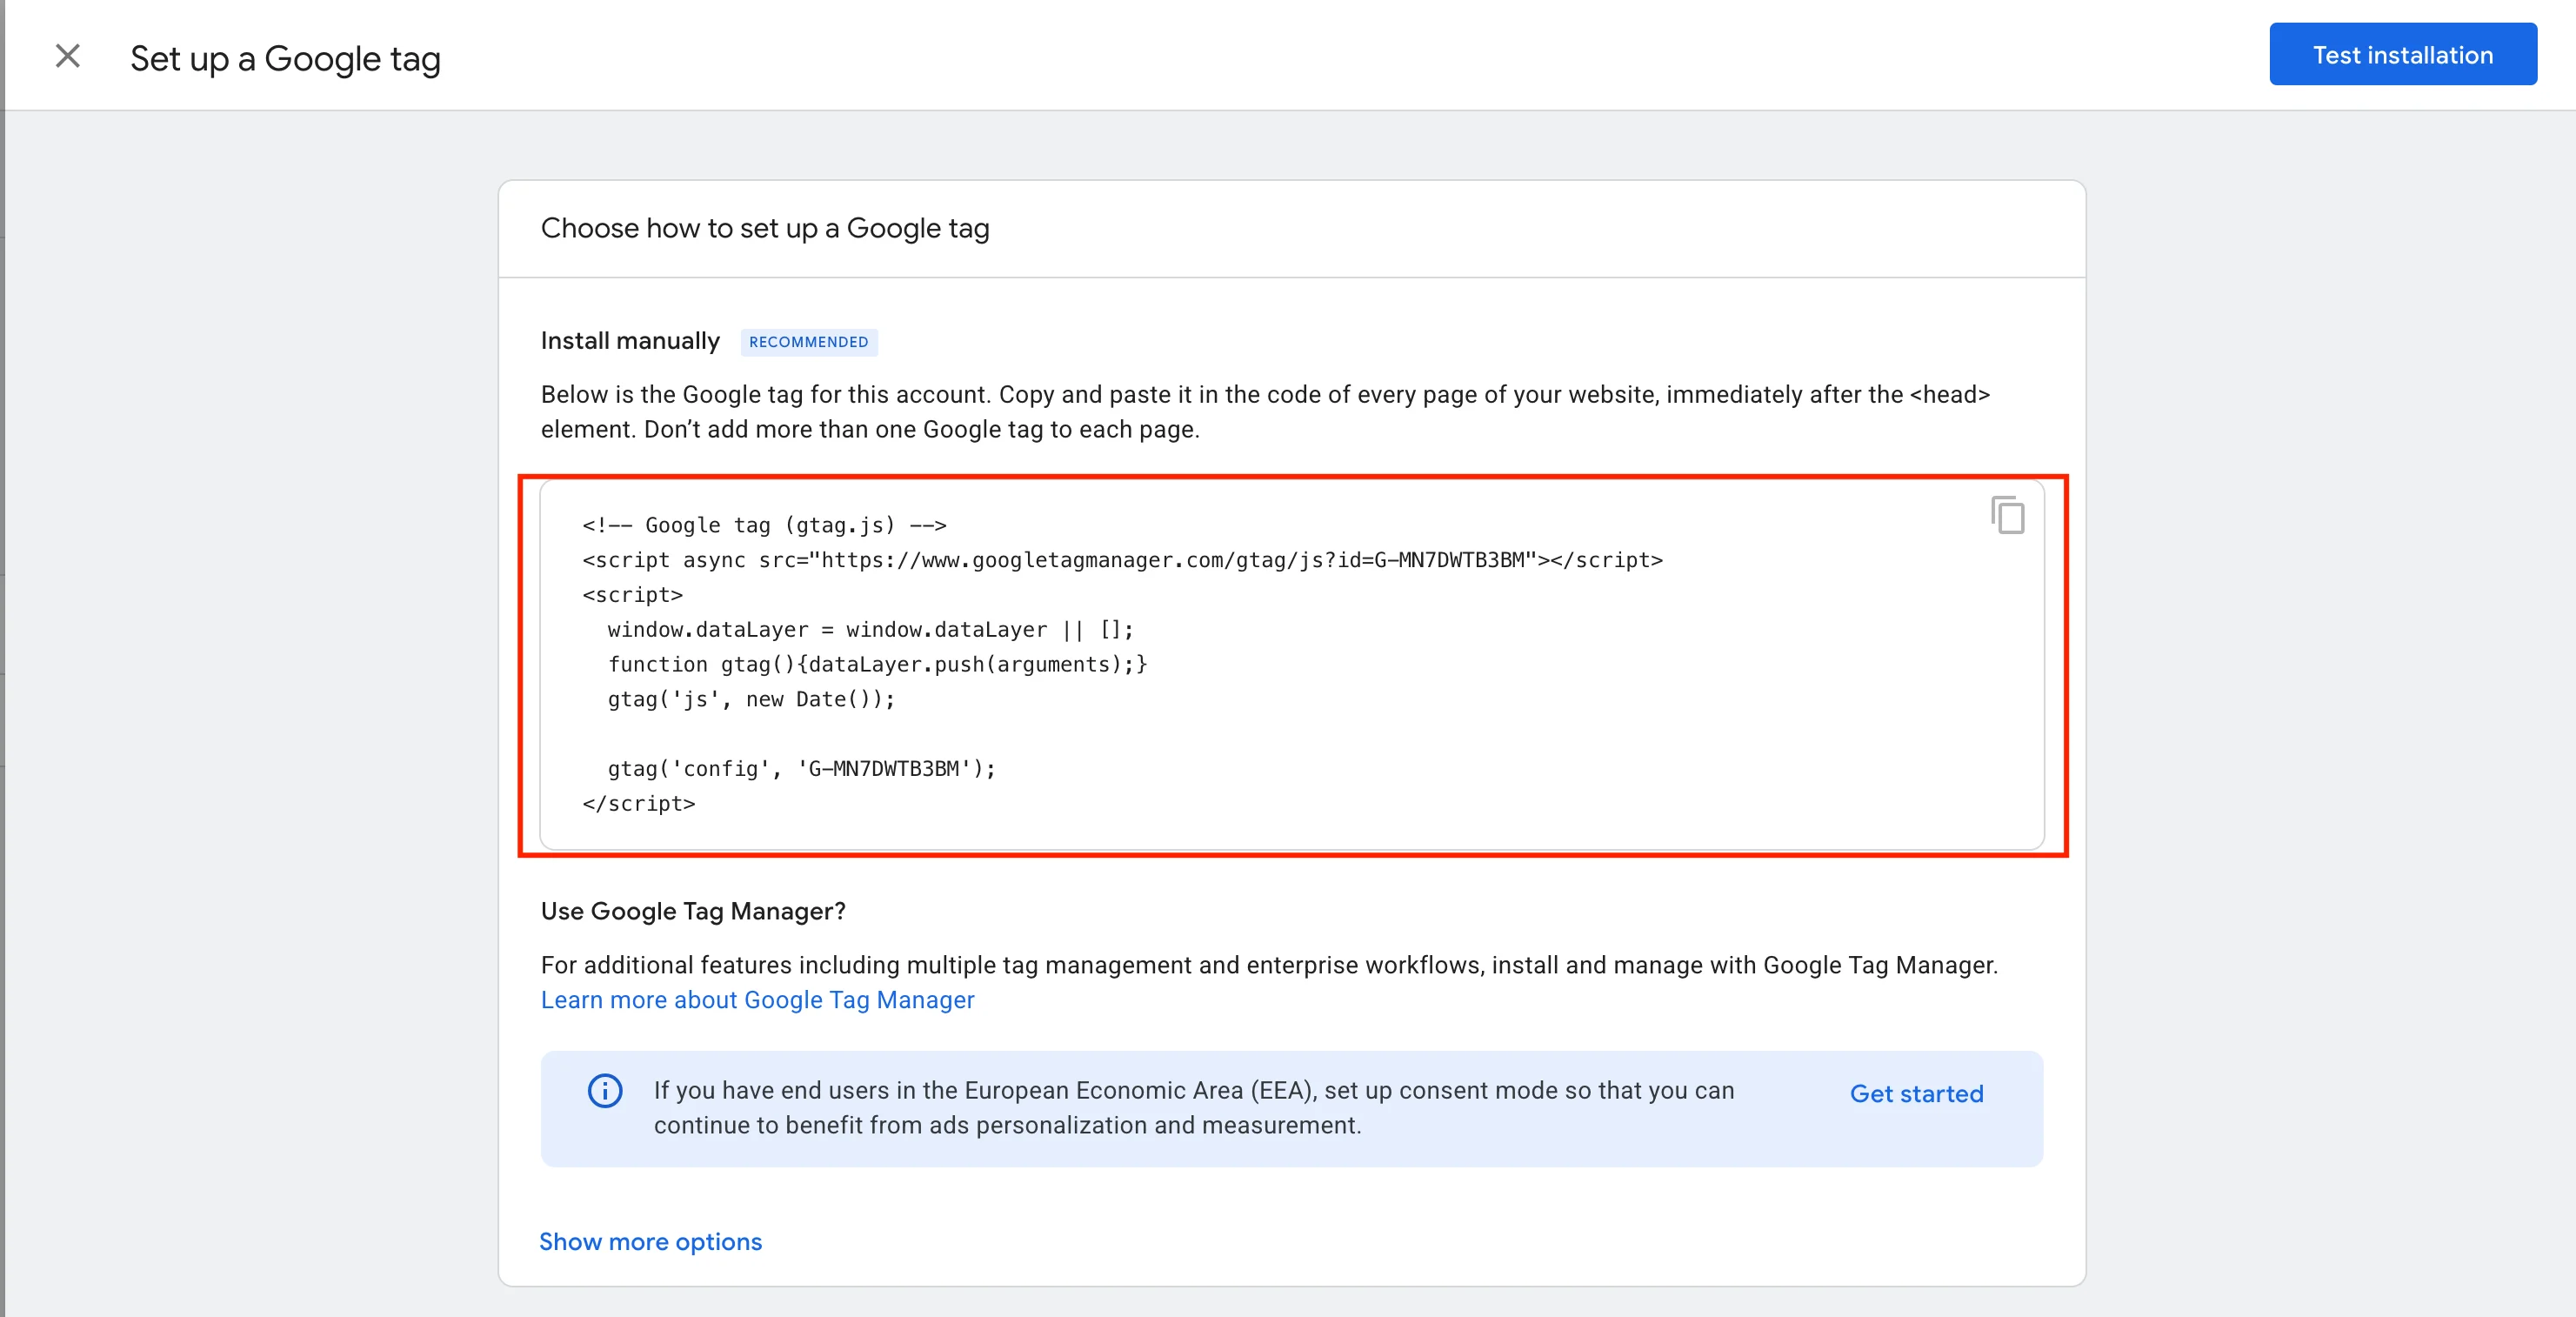
On the stream details page, click "View tag instructions" and select "Install manually." You will see a code snippet:
<!-- Google tag (gtag.js) -->
<script async src="https://www.googletagmanager.com/gtag/js?id=G-XXXXXXXXXX"></script>
<script>
  window.dataLayer = window.dataLayer || [];
  function gtag(){dataLayer.push(arguments);}
  gtag('js', new Date());
  gtag('config', 'G-XXXXXXXXXX');
</script>
Paste this snippet into the <head> section of every page, as close to the opening tag as possible. If your site uses a global header template (like header.php in WordPress or head.html in other CMSs), you only need to add the code there once.
Once published, open your website in a browser and check the "Reports" > "Realtime" section in GA4. If you see at least one active user (that's you), the code is working correctly.
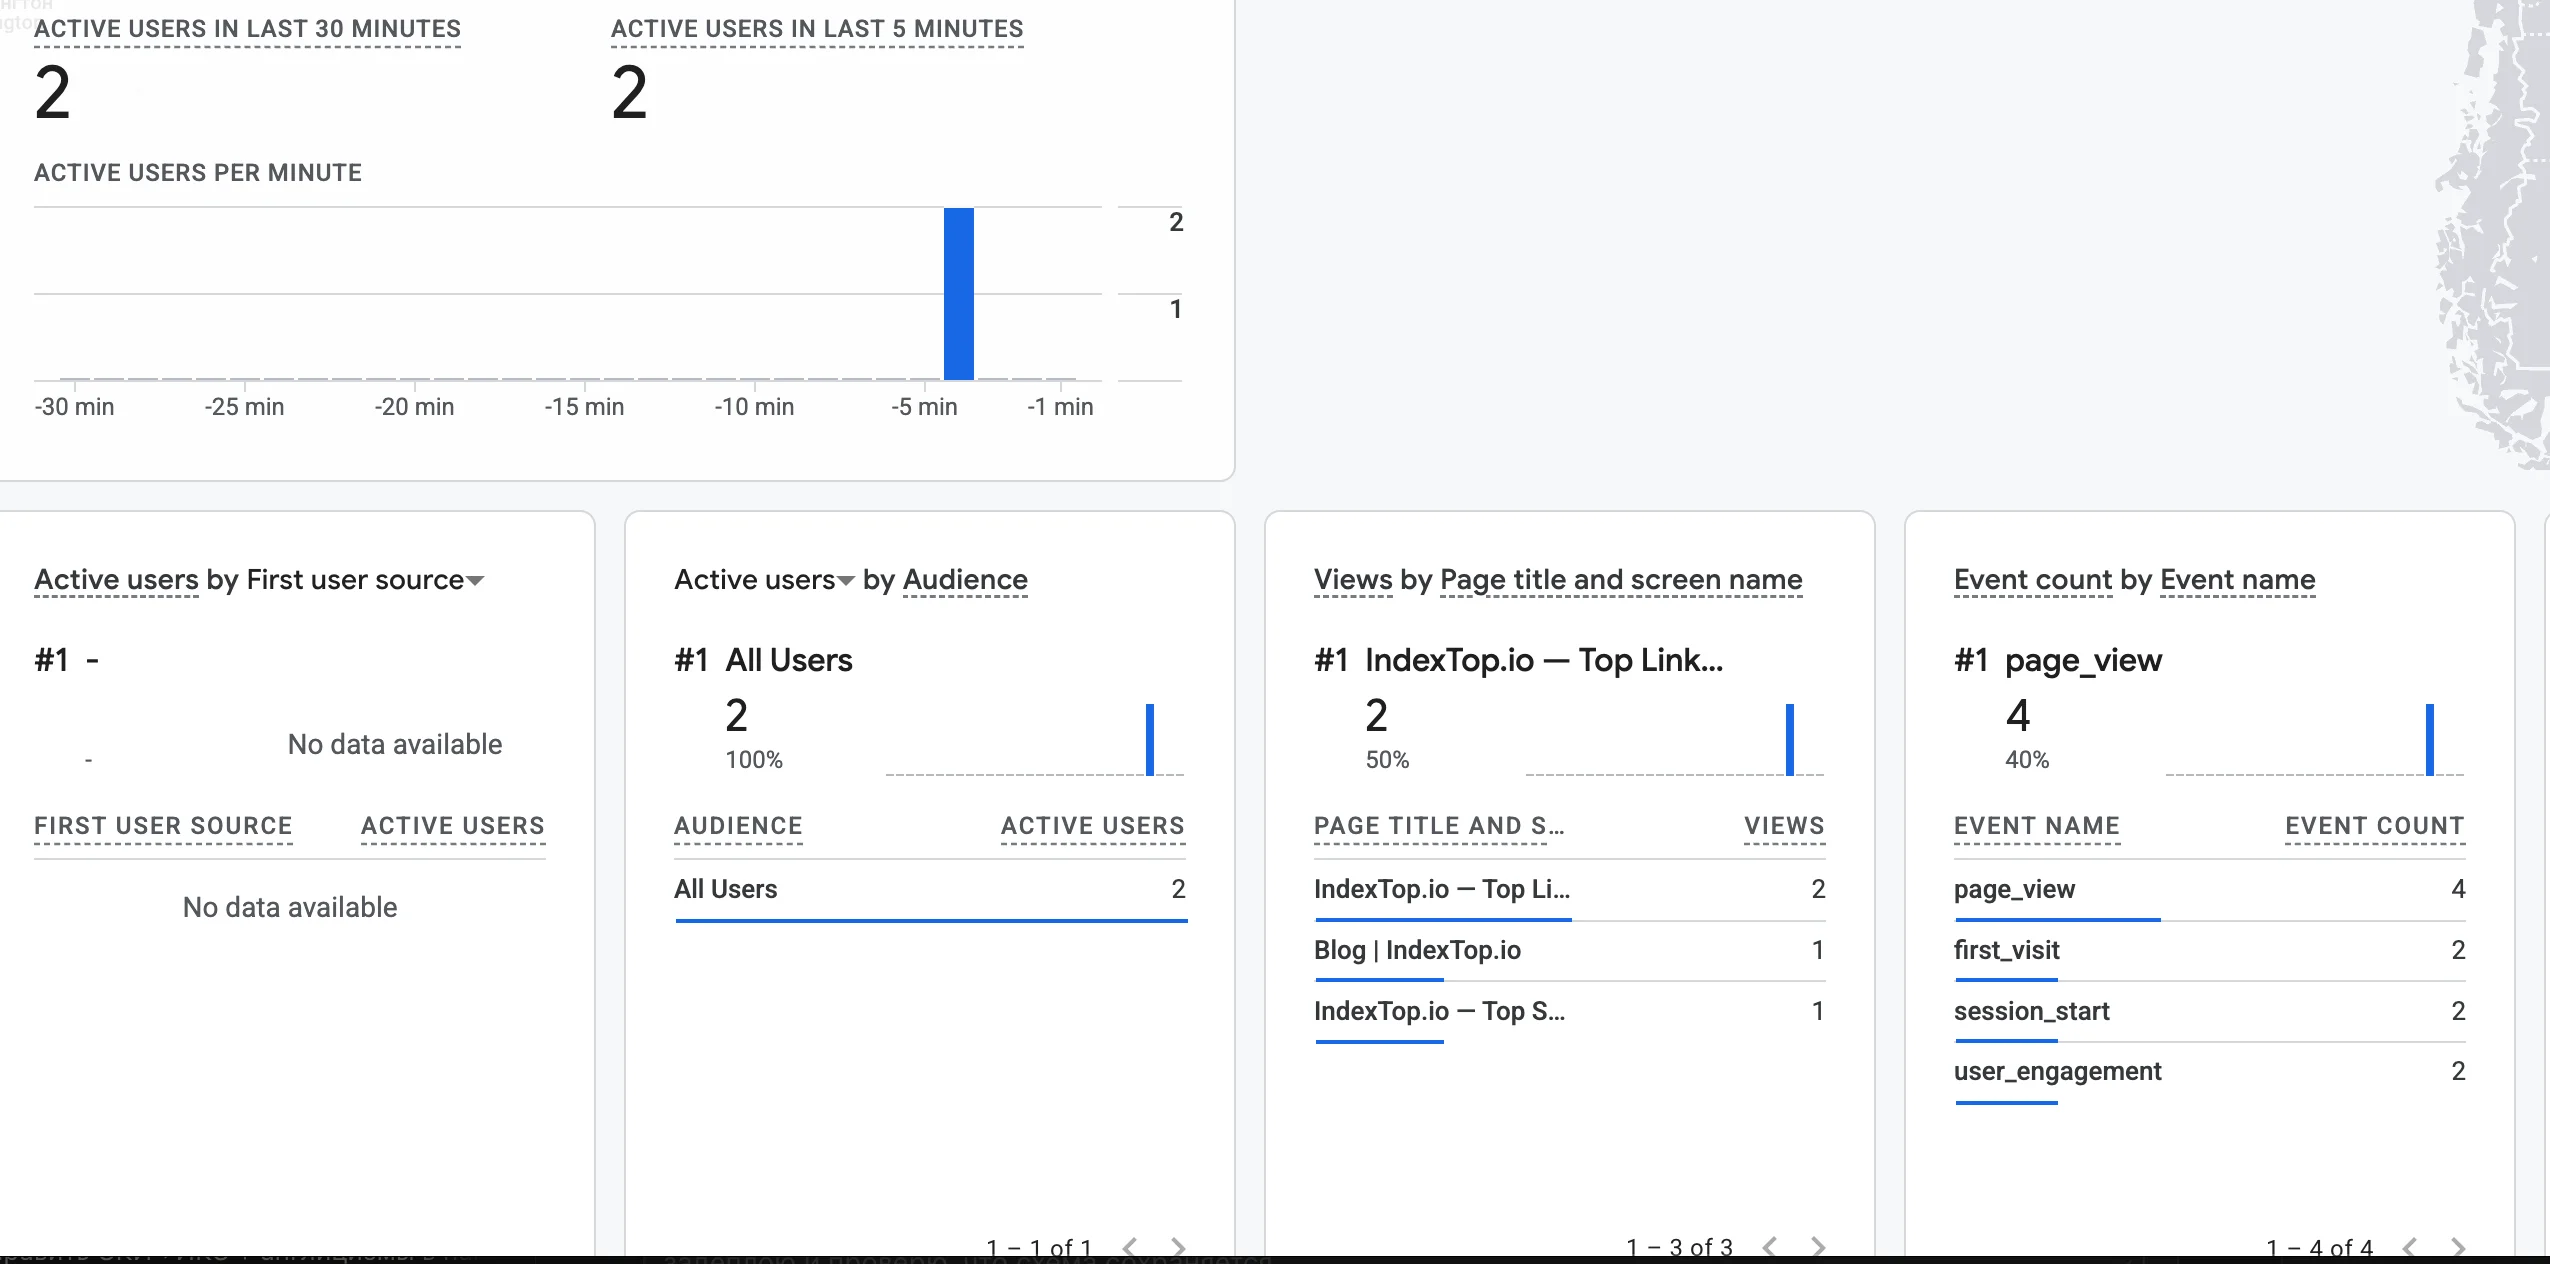 Screenshot: GA4 Realtime report showing one active user
How to install Google Analytics on WordPress using a plugin
Manually inserting code in WordPress requires editing theme files, which will be overwritten when the theme updates. Using a plugin solves this issue.
Site Kit by Google is the official Google plugin for WordPress. It connects Analytics, Search Console, and PageSpeed Insights within a single dashboard.
The setup takes about 5 minutes:
- Log in to wp-admin and go to "Plugins" > "Add New."
- Search for "Site Kit by Google," click "Install Now," and then "Activate."
- On the Site Kit page, click "Start setup" and sign in with your Google account.
- The plugin will request permissions to access Analytics and Search Console. Grant both.
- Select the GA4 property you created earlier and complete the setup.
Site Kit will automatically add the tracking code to all pages and remove it if the plugin is deactivated.
 Screenshot: Site Kit by Google interface in the WordPress dashboard after setup
If you want to view your data directly inside wp-admin, MonsterInsights is a solid alternative. The free version displays basic metrics (sessions, traffic sources, top pages) on a dedicated "Insights" dashboard in the WordPress sidebar. The connection process is similar: install the plugin, authenticate with Google, and select your property. Be sure to check the free plan's features before installing, as they change occasionally.
How to connect GA4 to Tilda
Tilda allows you to add Google Analytics without editing any code. Here is how to do it:
- Open "Site Settings" (the button in the top-left corner of the editor).
- Go to the "Analytics" tab.
- In the "Google Analytics 4" field, paste your Measurement ID (formatted as
G-XXXXXXXXXX). - Click "Save Changes" and republish all pages by clicking "Publish all pages."
If you don't republish the pages, the ID won't apply to your live content. Wix and Squarespace work similarly: you can find the Measurement ID field in the site settings under "Marketing" or "Integrations."
What to do immediately after setup
Adding the code to your site is just the bare minimum. To get actionable data from day one, complete these additional steps:
- Link GA4 with Google Search Console. Go to "Admin" > "Product links" > "Search Console links". Once linked, you'll see the search queries users use to find your site directly in your reports.
- Filter internal traffic. Otherwise, your own visits will skew your statistics. Go to "Admin" > "Data streams" > "Configure tag settings" > "Define internal traffic". Enter your IP address.
- Set up your first conversion event. If your site has a contact form or a purchase button, mark the corresponding event as a conversion under "Admin" > "Conversions". This lets you track traffic quality, not just quantity.
- Wait 24-48 hours and check the "Traffic acquisition" report to ensure data is flowing and channels are attributed correctly.
Common installation mistakes
Placing the code in the <body> instead of the <head>
Technically, GA4 works in the <body>, but the tag will load later, meaning some short sessions might not be tracked. Always place the code in the <head>.
Duplicate tracking code
If you manually paste the code and then activate a plugin, the tag will end up on the page twice. This causes pageviews to double-count. Check your page source (Ctrl+U): if the line containing gtag/js?id=G- appears twice, remove one of the instances.
Measurement ID starts with "UA-"
"UA-XXXXXXX" is the format for the legacy Universal Analytics, which was deprecated in July 2023. If you see this ID format, you are using an outdated property. Create a new GA4 property to get a "G-" formatted ID.
Ad blockers interfering with testing
When testing with the Realtime report, use a browser without extensions like uBlock Origin or AdBlock. These extensions block googletagmanager.com, preventing you from showing up in reports even if the code is installed correctly.
FAQ
Is Google Analytics free?
Can I add GA4 to my site without code access?
How long does it take for data to show up in reports?
Can I connect a single GA4 property to multiple websites?
Do I need Google Tag Manager to install GA4?
How do I verify that GA4 is collecting data correctly?
What should I do if data isn't showing up?
Conclusion
For WordPress, using Site Kit is the fastest route: five steps without editing any files. For Tilda, simply paste the Measurement ID in the site settings and republish your pages. For other CMSs and custom-built sites, just add the single code snippet to the <head>. Once installed, verify the setup using the Realtime report, ensure your ID starts with "G-", and complete the basic post-setup steps: link GA4 to Search Console, set up your traffic filter, and create your first conversion.
Official Google documentation on installing the tag: support.google.com/analytics/answer/9304153.
Read also

How to Add Your Site to Yandex Webmaster and the Search Index: A Step-by-Step Guide
Step-by-step guide to adding your website to Yandex Webmaster. Learn how to verify domain ownership using four different methods and successfully get your pages indexed.

How to Add a Website to Bing Webmaster Tools: A Step-by-Step Guide
Learn how to add your site to Bing Webmaster Tools, verify ownership manually or via Google Search Console, and speed up page indexing in Bing.