How to Add Your Site to Yandex Webmaster and the Search Index: A Step-by-Step Guide
Step-by-step guide to adding your website to Yandex Webmaster. Learn how to verify domain ownership using four different methods and successfully get your pages indexed.

To add a site to Yandex Webmaster, go to webmaster.yandex.com/sites/add/, enter your HTTPS URL, and verify ownership using one of four methods: a meta tag, an HTML file, a DNS record, or Yandex Metrica. Once verified, the crawler will start indexing your site, and you'll get access to indexing and error reports.
What you'll need
Before you start, make sure you have the following ready:
- A Yandex ID account (free to create);
- FTP access to the site's root folder or CMS admin credentials;
- Access to your domain registrar's control panel (if using the DNS method);
- A publicly accessible website (you cannot verify a site blocked by robots.txt or password protection).
Make sure your HTTPS domain has a valid SSL certificate. In 2026, HTTP is no longer a viable option-Yandex strictly prefers a secure connection.
Step 1. Log in to Yandex ID
Go to webmaster.yandex.com and click "Log in." Use your existing email account or create a new one. I recommend setting up a dedicated "work" Yandex ID for all your projects to keep client sites separate from your personal accounts.
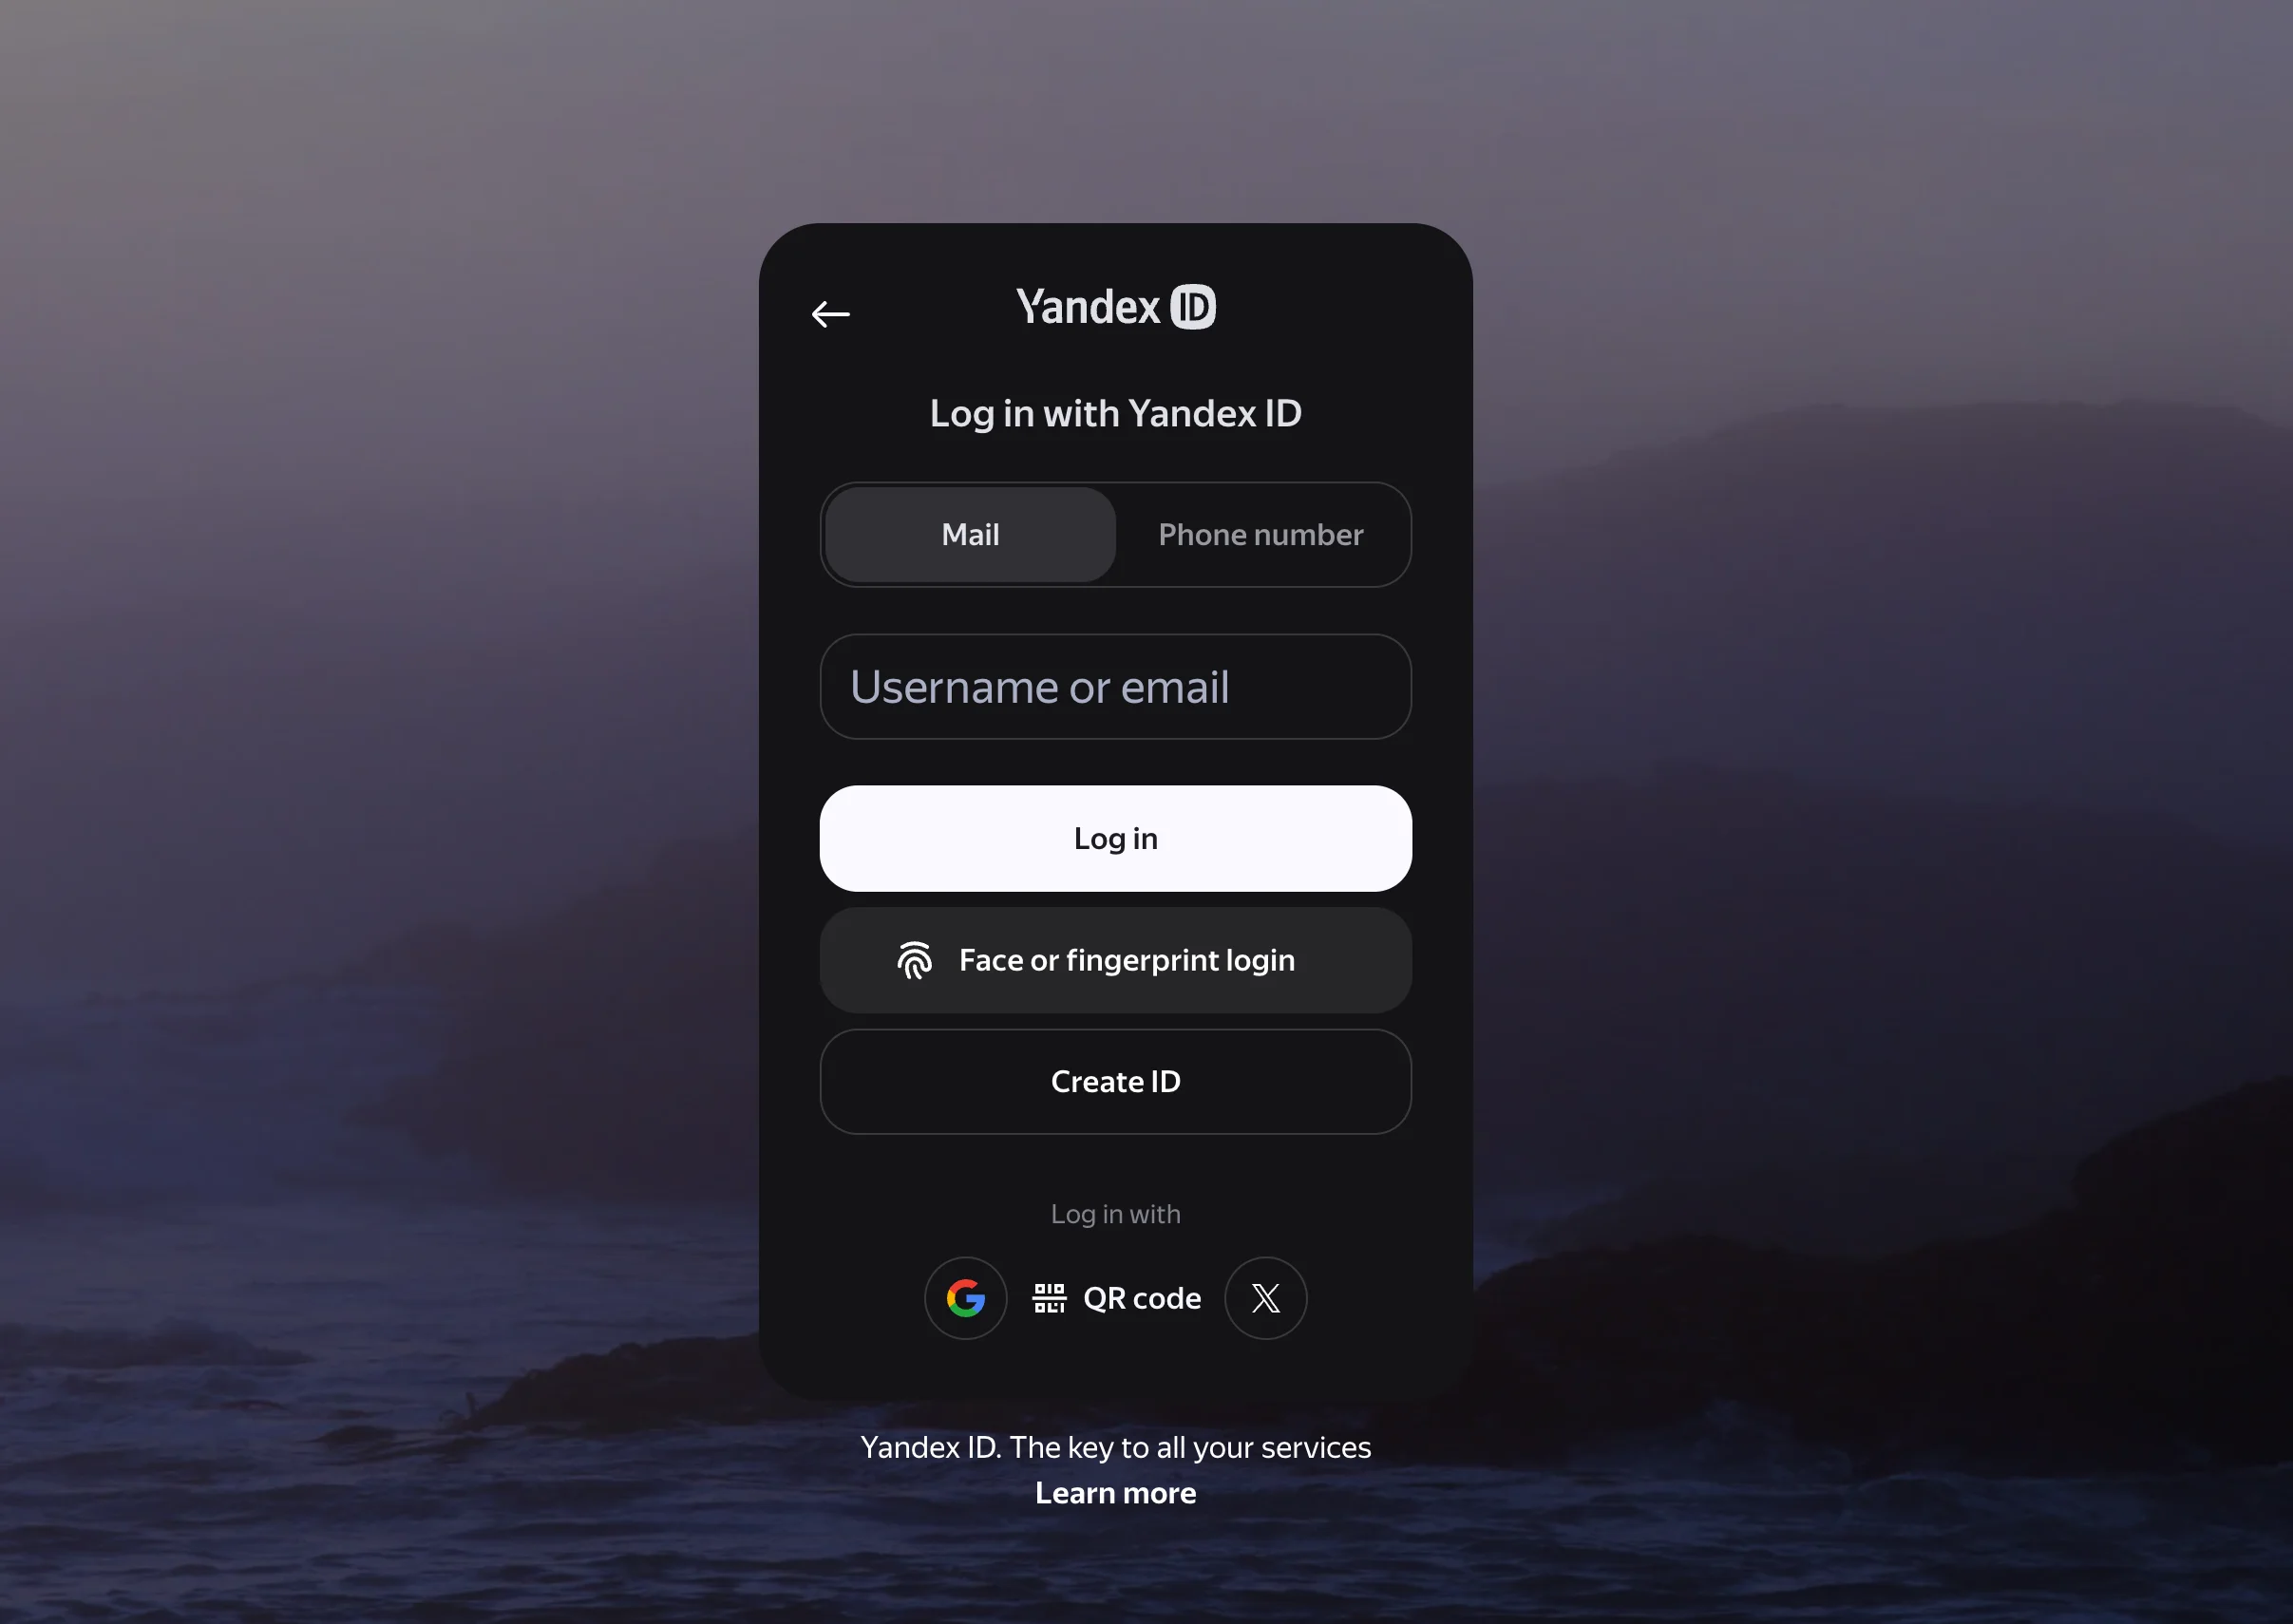 Screenshot: Yandex Webmaster login screen
Step 2. Add your website URL
On the main dashboard, click the "+" button to "Add site." Enter your full URL, for example, https://example.com. If your site has both WWW and non-WWW versions, add the one that returns a 200 OK status code without redirects-this will be your primary mirror.
Click "Add." This will open the verification options page.
 Screenshot: Add website form
Step 3. Verify site ownership
Yandex offers four verification methods. Choose the one that works best for you:
- Meta tag. Copy the meta tag (e.g.,
<meta name="yandex-verification" content="...">) and paste it into the<head>section of your homepage.
- WordPress: Paste it into the verification field of plugins like Yoast SEO ("General → Webmaster Tools" or "Site connections"), Rank Math ("General Settings → Webmaster Tools"), or All in One SEO ("General Settings → Webmaster Tools").
- Tilda: Go to "Site Settings → SEO → Custom HTML code for HEAD."
- 1C-Bitrix: Edit the template's
header.phpfile or use the SEO module in the "Marketing" section.
- HTML file. Download the unique HTML file and upload it to your site's root directory via FTP. Make sure it loads at a direct URL like
https://example.com/yandex_xxxx.html. - DNS record. Add a TXT record to your domain's DNS settings. DNS propagation can take anywhere from 15 minutes to a few hours, and occasionally up to 24 hours.
- Via Yandex Metrica. The fastest option if you already have the tracking tag installed and are logged into the Yandex ID that owns the Metrica tag.
Once you've set it up, click "Check." If everything matches, your status will update to "Ownership verified." If you run into issues, the official Yandex Help guide breaks down each method in detail.
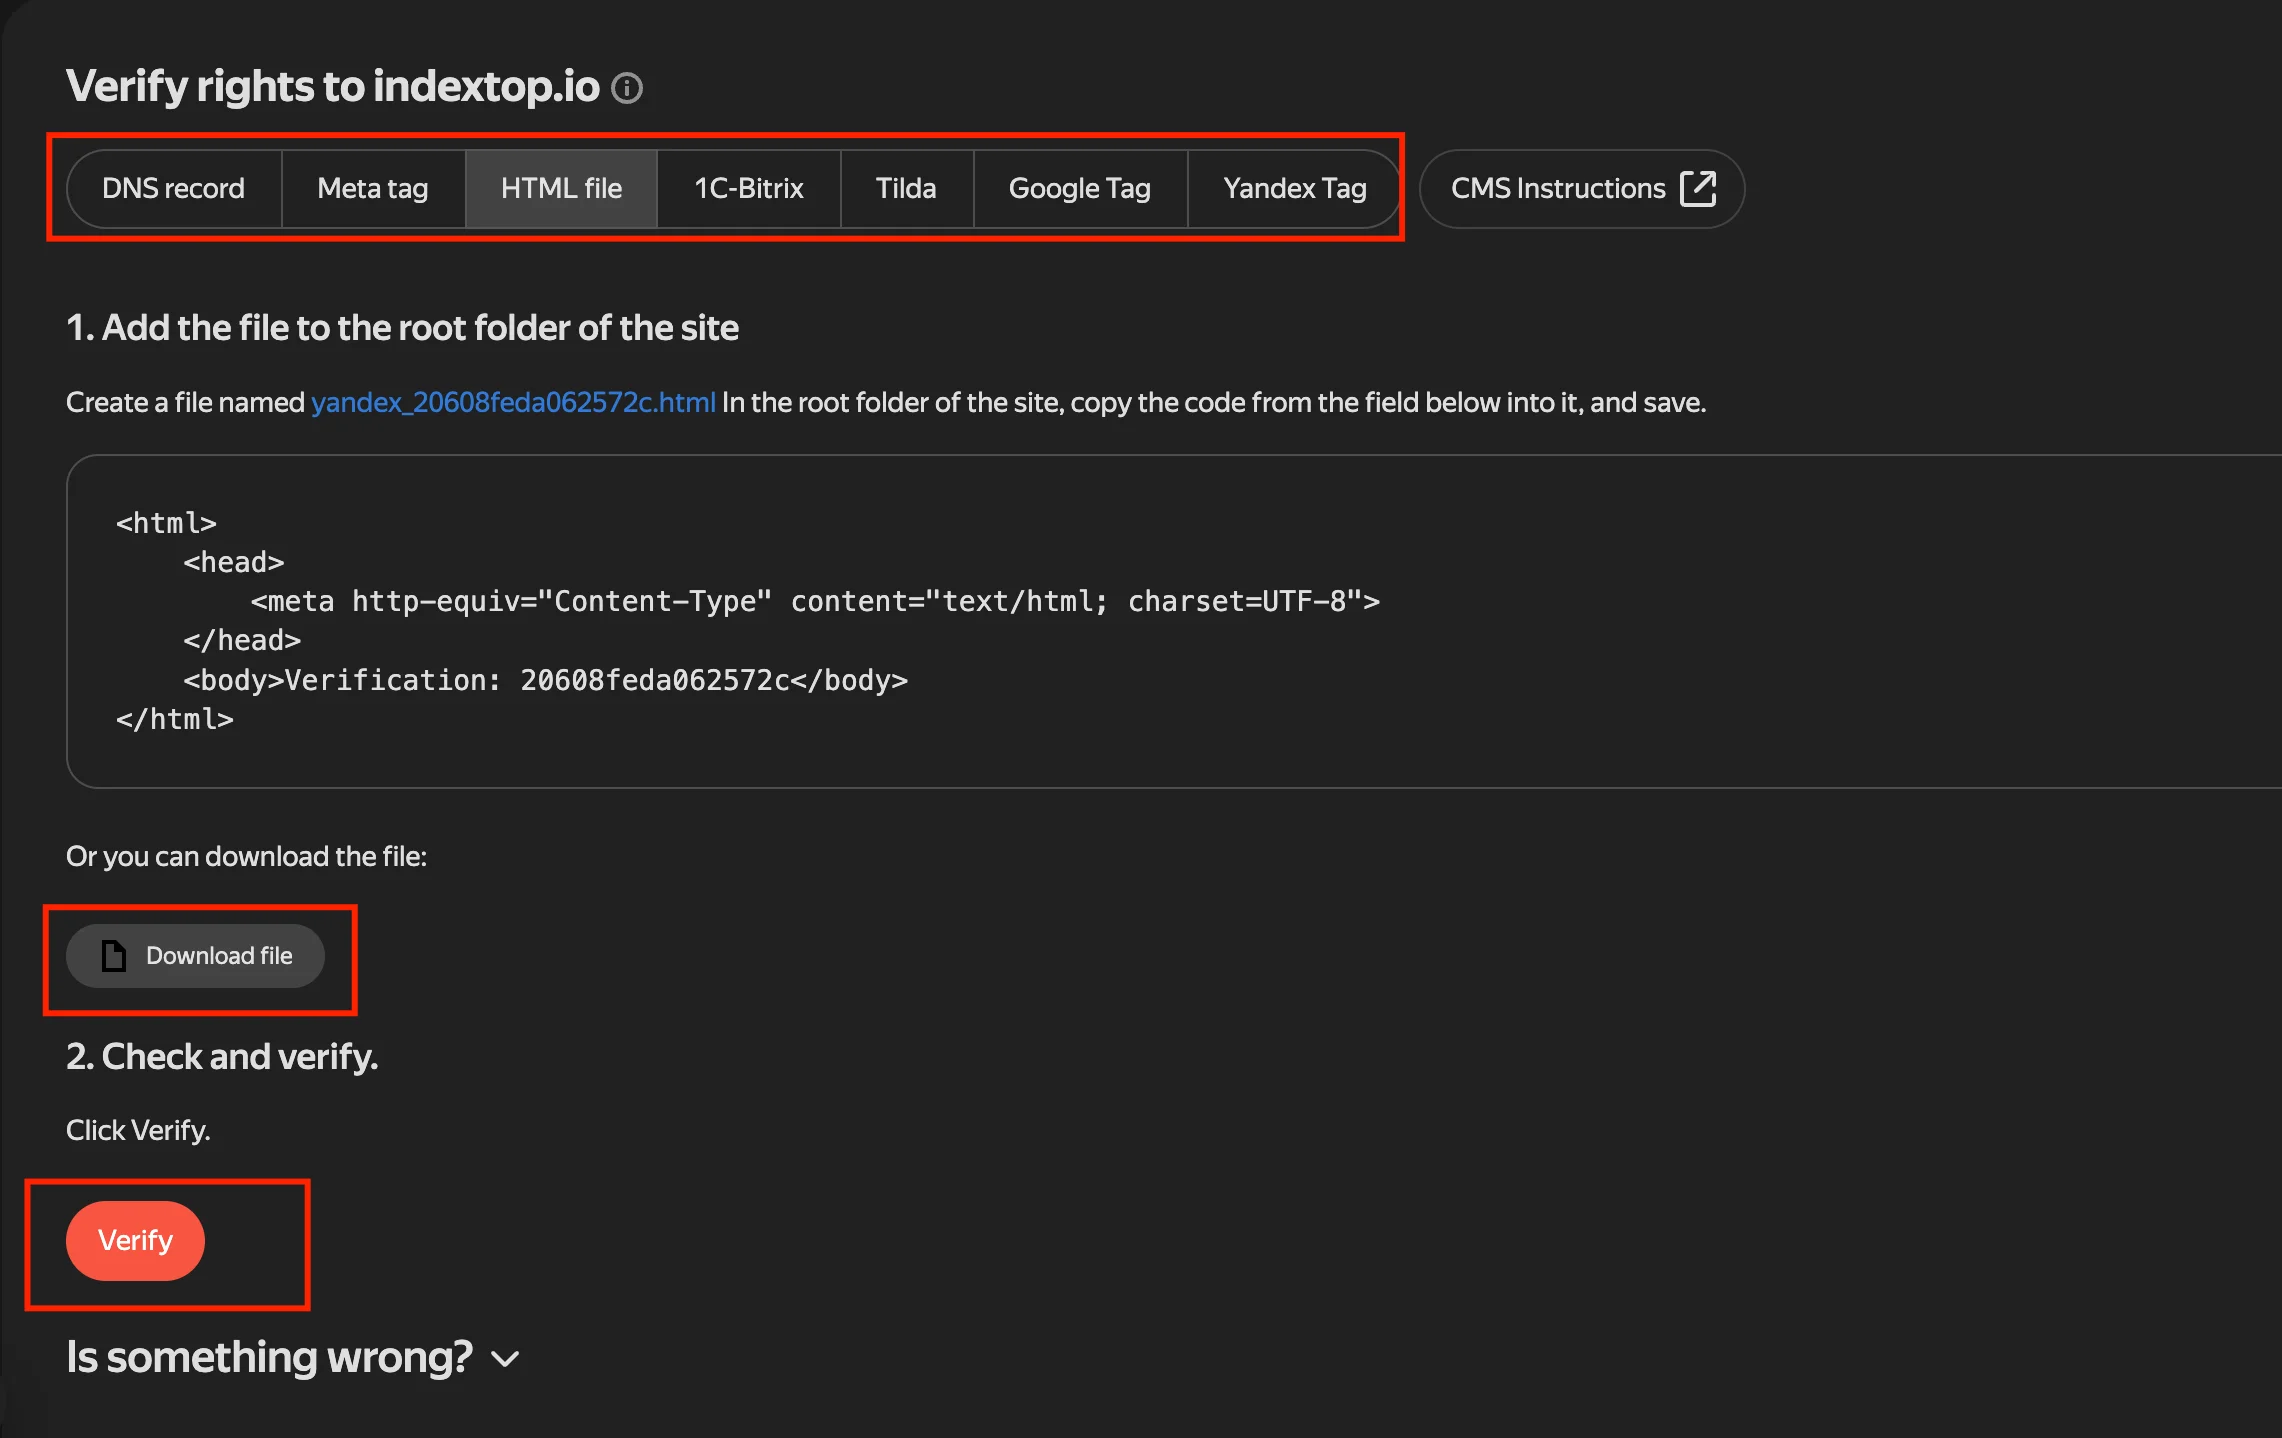 Screenshot: Verification method selection page
Step 4. Submit your site for indexing
Verifying ownership doesn't automatically index your site. To get Yandex to index your pages, do these three things:
- Submit your
sitemap.xmlunder "Indexing → Sitemap files"; - Check your
robots.txtto ensure you aren't blocking the site with aDisallow: /directive; - Submit key URLs via the "Reindex pages" tool. The submission limit depends on your site's trust level and is displayed right below the form. New sites usually get a few URLs per day, while established projects enjoy a much higher quota.
In my experience with client projects, a new 40-page corporate site usually gets 60-80% of its pages indexed within 2-3 weeks of verification and sitemap submission. Simple one-page landing pages can sometimes index in just 3-5 days.
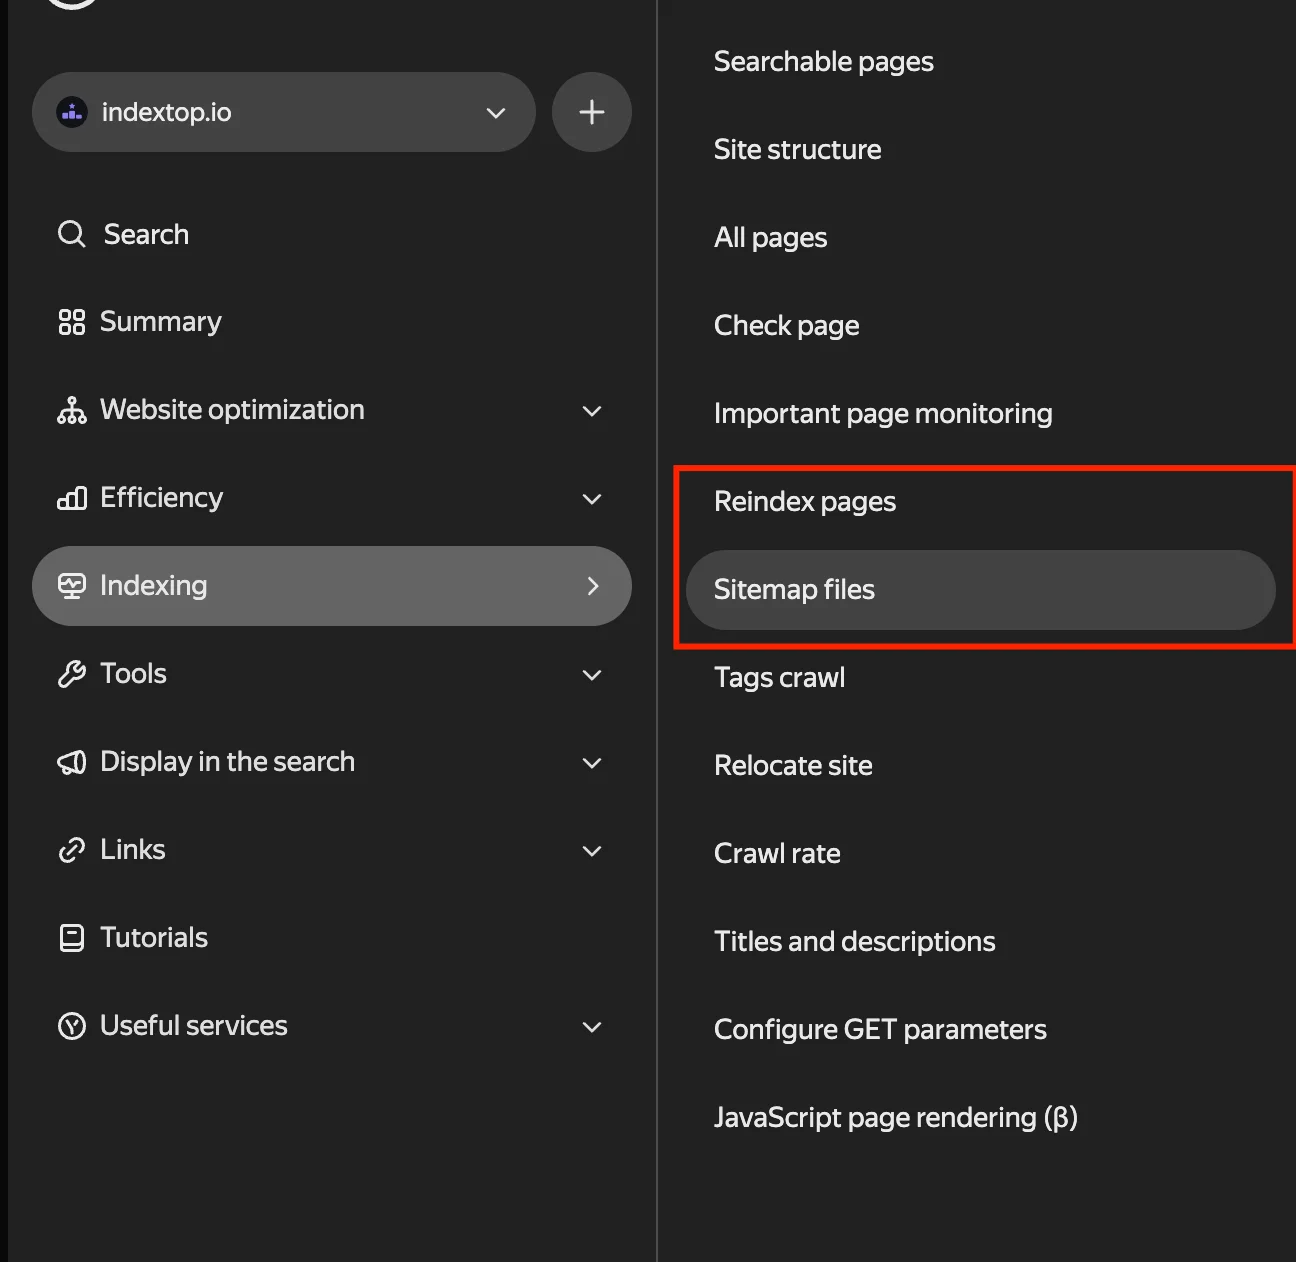
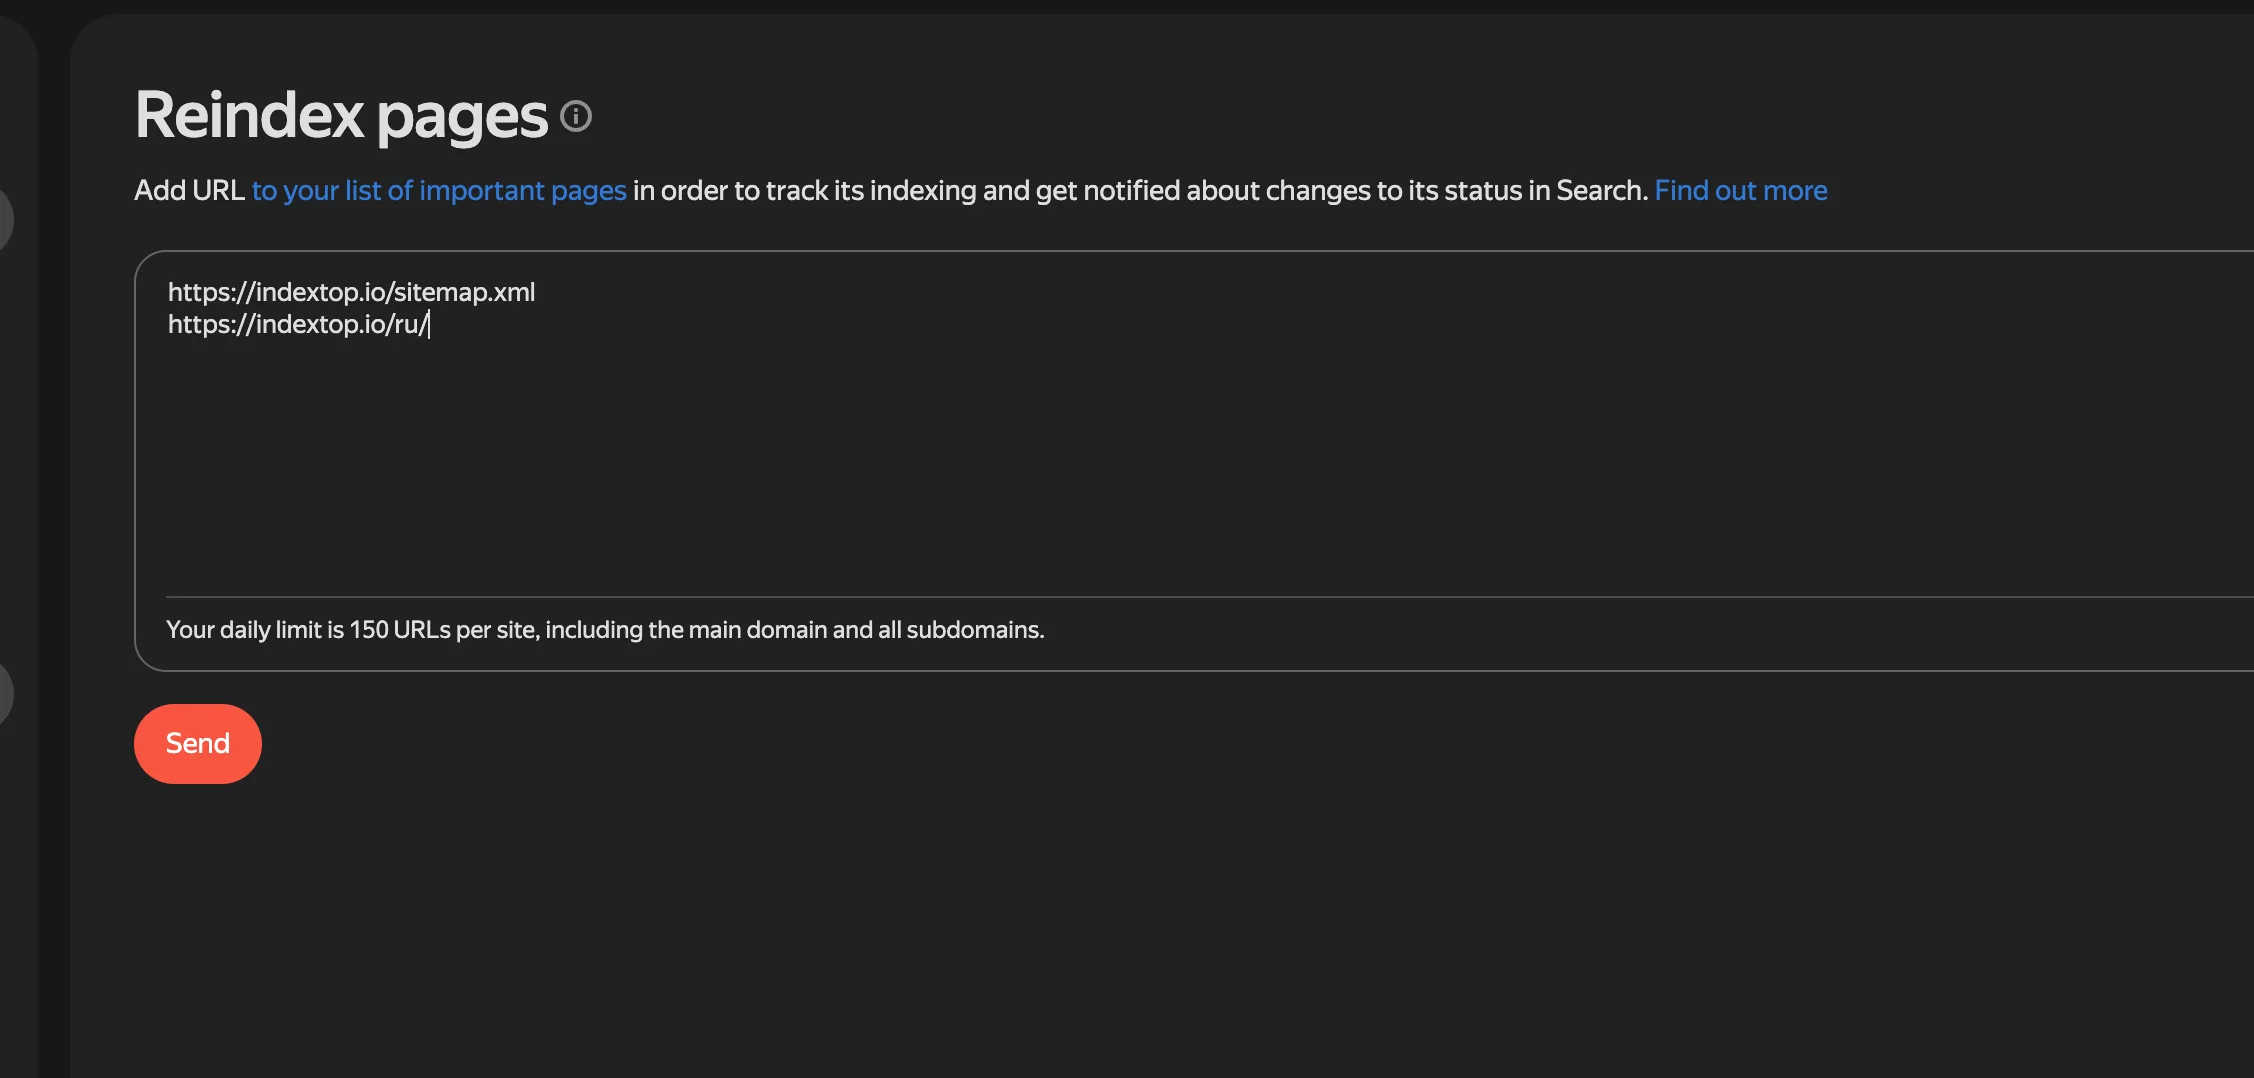 Screenshot: Reindex pages tool
Common Mistakes
- Adding the wrong protocol. If your main site uses
httpsbut you added the HTTP version, your reports will show no data. Fix: Add both versions and set the HTTPS one as the primary mirror in your settings. - Verification failures. This is often caused by CMS or CDN caching (like Cloudflare or Selectel CDN). Clear your cache and try verifying again.
- Sitemap parsing errors. Open the sitemap URL in your browser: it must return valid XML, not a 404 error or a redirect to the homepage.
- Yandex ID mismatch. To verify via Metrica, the tracking tag must be owned by the exact same Yandex ID you are using to access Webmaster.
FAQ
How long does it take for a site to appear in Yandex search?
Can I add a site to Yandex without using Webmaster?
Do I need to verify subdomains separately?
What if I lose access to my Yandex ID?
Is the service free?
Can I add a site hosted on a free platform?
<head> or upload files to the root directory. Website builders like Tilda, Nethouse, and uCoz support this directly through their settings.Next Steps: Key Yandex Webmaster Reports
Once ownership is verified, I recommend checking these four sections weekly:
- Site Diagnostics. Shows critical and fatal errors (homepage downtime, server errors, robots.txt issues). If you see red warnings, fix them immediately-they block indexing.
- Search Queries. Provides data on impressions, clicks, and rankings over time. This makes it easy to see which search queries drive visibility and where you need to improve CTR.
- Site Information → Regionality. Sets your geographic targeting for local search results. You can configure this via Yandex Business (formerly Yandex Spravochnik) or manually by linking your contact page.
- SQI (Site Quality Index). Yandex's internal site quality metric, updated roughly once a month. It reflects user trust and indirectly affects your crawl budget. You can boost it by improving user behavior metrics, building backlinks, and increasing brand mentions.
Link Yandex Metrica to the same account to unlock behavioral data in your Webmaster reports. This gives you the full picture: what Yandex knows about your site and how visitors interact with it.
Read also

How to Install Google Analytics on Your Website: A Step-by-Step Guide
A step-by-step guide to setting up Google Analytics 4 on your website. Learn how to create an account, configure a data stream, and install the code without any coding skills.

How to Add a Website to Bing Webmaster Tools: A Step-by-Step Guide
Learn how to add your site to Bing Webmaster Tools, verify ownership manually or via Google Search Console, and speed up page indexing in Bing.